Hardiplank Installers Your Guide to Quality
Hardiplank installers are crucial for a flawless exterior. They’re the experts who understand the nuances of different Hardiplank products, from siding to panels. This guide covers everything from finding reputable installers to mastering installation techniques and safety precautions. You’ll learn about the essential skills needed, the right tools, and how to prep your surface for a long-lasting installation.
Choosing the right Hardiplank installer is vital for your project’s success. We’ll explore various methods to locate qualified professionals, evaluating experience, certifications, and references. Plus, we’ll delve into the important aspects of checking licenses and insurance. Understanding cost breakdowns and services offered by different installers will also be key to making an informed decision.
Introduction to Hardiplank Installers
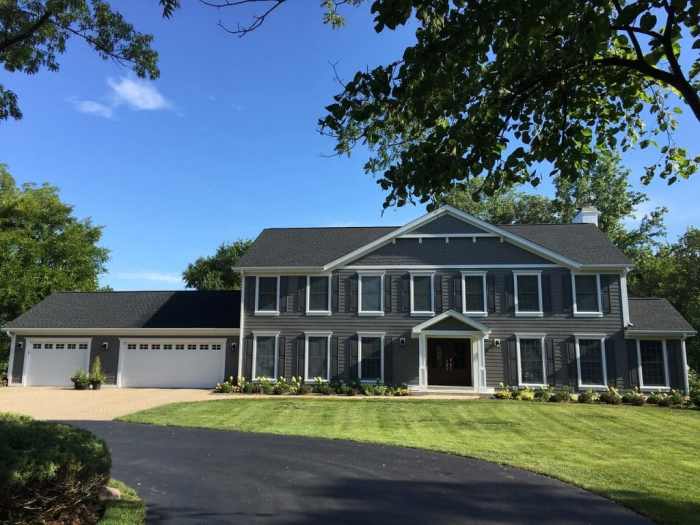
Hardiplank is a popular exterior cladding material, offering a durable and attractive alternative to traditional siding. It’s a fiber cement product, known for its resistance to rot, insects, and fire. This makes it a great choice for homeowners seeking long-lasting protection for their homes.
Understanding Hardiplank involves more than just knowing its aesthetic appeal. A skilled Hardiplank installer possesses a deep understanding of the material’s properties, installation techniques, and the specific needs of different applications. This guide will provide a foundation of knowledge for those looking to install Hardiplank siding and panels.
Hardiplank Products, Hardiplank installers
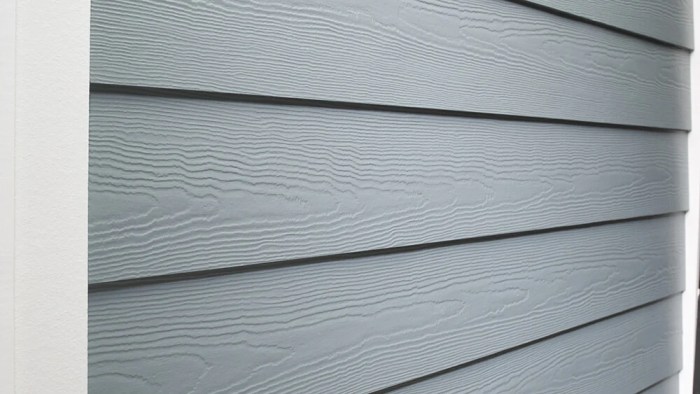
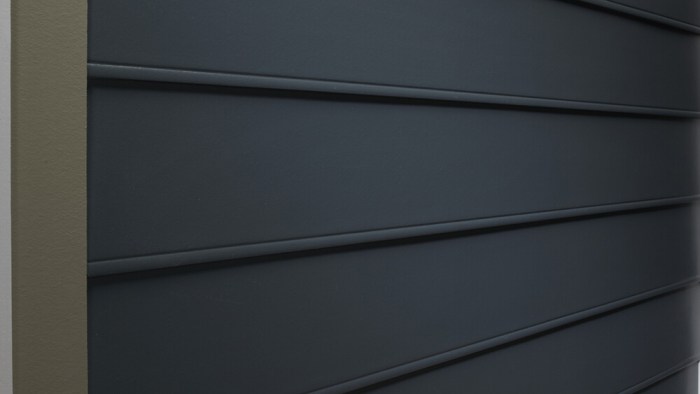
Hardiplank comes in various forms, each designed for specific applications. Knowing the different types helps installers tailor their approach to the project. Common Hardiplank products include: HardiePlank siding, panels, and trim. Siding is used to cover exterior walls, while panels are often used for accent walls or other structural elements. HardiePlank trim provides finishing details, enhancing the overall aesthetic.
Essential Skills and Knowledge
Proficient Hardiplank installation requires a blend of practical skills and theoretical knowledge. Installers must be adept at measuring, cutting, and assembling the material accurately. Understanding building codes and safety regulations is also critical. Additionally, knowledge of different installation techniques (e.g., nailing, screwing) and the proper use of specialized tools is essential for quality work. This includes the ability to assess the condition of the substrate and select appropriate fasteners.
Tools and Equipment
A comprehensive set of tools and equipment is necessary for Hardiplank installation. The list includes but is not limited to: measuring tools (tape measures, levels), cutting tools (utility knives, reciprocating saws, circular saws), fastening tools (power drills, impact drivers, nail guns), and safety equipment (safety glasses, hearing protection, work gloves). Proper selection and maintenance of these tools ensure efficient and safe installation. Specific tools may be required depending on the project’s scope and complexity.
Comparison of Installation Methods
Different installation methods for Hardiplank offer varying advantages. The choice often depends on the specific project requirements and the installer’s experience. This table summarizes the benefits of different installation methods:
| Installation Method | Advantages | Disadvantages | Suitable Applications |
|---|---|---|---|
| Nailing | Faster installation, potentially lower cost, suitable for simpler projects | May not be as strong as screwing, potential for nail pops or damage to the Hardiplank | Projects where speed is prioritized, and the substrate is stable |
| Screwing | Stronger, more durable installation, reduced risk of cracking or warping, better long-term performance | Slower installation, higher cost | Projects requiring superior durability, and for more complex installations |
| Adhesive | Eliminates the need for fasteners, creates a watertight seal, aesthetically pleasing finish | The installation process can be more time-consuming, and may not be as strong as other methods. | Applications requiring a sealed or aesthetic finish, or on challenging substrates |
Finding Hardiplank Installers

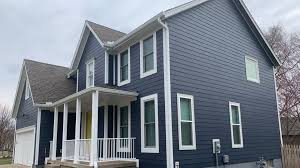
Source: stlsidingpros.com
Finding the right Hardiplank installer is crucial for a successful and long-lasting project. A qualified installer ensures proper installation techniques, leading to a beautiful and durable finish that meets your needs. Poor installation can result in costly repairs and aesthetic issues down the road.
Methods for Locating Installers
There are several effective ways to find qualified Hardiplank installers. Word-of-mouth recommendations from trusted sources can be a great starting point. Checking with local building supply stores and contractors who specialize in exterior renovations is another excellent option. These professionals often have relationships with reliable installers in their network. Online resources also provide valuable avenues for finding potential installers.
Online Resources and Directories
Numerous online resources and directories specialize in connecting homeowners with contractors. These platforms often allow you to filter by service area, experience level, and specific skills like Hardiplank installation. You can also read reviews and testimonials from previous clients to assess the installer’s reputation. Using online search engines to find installers in your area is also a viable option.
Evaluating Potential Installers
Evaluating potential installers involves assessing their experience, certifications, and references. Experience is key; look for installers with a proven track record in Hardiplank installations. Certifications from reputable organizations like the National Association of Home Builders (NAHB) can signal a higher level of expertise and adherence to industry standards. Requesting references from previous clients is essential. This allows you to assess their work quality, professionalism, and communication skills. Ask for pictures of completed projects to gauge the quality of their work.
Checking Licenses and Insurance
It’s imperative to verify an installer’s licensing and insurance coverage. A valid contractor’s license ensures they are authorized to perform work in your area. Insurance protects you in case of accidents or damage during the installation process. Always request proof of both.
Comparing Installers
Comparing installers based on their costs and services is a crucial step in making informed decisions. A comprehensive comparison enables you to select the installer that best aligns with your budget and project needs.
| Installer | Cost per Square Foot | Services Offered | Customer Reviews |
|---|---|---|---|
| ABC Hardiplank Installation | $15-20 | Hardiplank installation, siding repair, exterior cleaning | 4.5 stars (average) |
| XYZ Construction | $18-25 | Hardiplank installation, exterior remodeling, roofing | 4.8 stars (average) |
| Green Home Solutions | $12-18 | Hardiplank installation, energy-efficient upgrades, and minor repairs | 4.2 stars (average) |
Note: Prices are estimates and can vary based on project size, complexity, and location.
Preparing for Hardiplank Installation
Getting ready for Hardiplank installation is crucial for a long-lasting and beautiful result. Proper preparation ensures a strong foundation for your Hardiplank panels, minimizing issues like warping, cracking, or premature deterioration. This involves meticulous surface work, precise measurements, and careful cutting of the materials.
Surface Preparation
Proper surface preparation is paramount for the longevity of your Hardiplank installation. A well-prepared surface allows for a strong adhesive bond between the panels and the substrate, preventing future problems. This involves removing any loose debris, repairing any cracks or damage, and ensuring a level and stable surface. Ignoring these steps can lead to the premature failure of the installation.
- Thorough Cleaning: Remove all loose debris, dirt, and old paint or coatings from the surface. Use a stiff brush, pressure washer (with caution to avoid damaging the substrate), or other appropriate cleaning methods. Ensure the surface is completely dry before proceeding.
- Repairing Damage: Address any cracks, holes, or other imperfections in the substrate. Fill these with appropriate patching compounds, ensuring a smooth, level surface. Allow the patching compound to dry completely before proceeding.
- Leveling the Surface: If necessary, level the surface using a self-leveling compound or other appropriate methods. A perfectly level surface will guarantee a consistent installation and reduce the risk of gaps or unevenness. Use a spirit level to check for flatness.
- Priming (if required): Some substrates may require priming. Priming enhances adhesion and prevents moisture issues. Check the manufacturer’s recommendations for the specific Hardiplank product and substrate type.
Measuring and Planning the Installation Layout
Accurate measurements and planning are essential for a seamless Hardiplank installation. A well-defined layout ensures the correct placement of panels, minimizing waste and maximizing efficiency. Consider factors like panel dimensions, the overall project area, and any architectural features.
- Precise Measurements: Accurately measure the area to be covered with Hardiplank. Take into account the length and width of the space, as well as any angles or curves. Double-check your measurements to avoid errors.
- Layout Design: Create a detailed plan of the installation layout, including panel placement, overlaps, and any special considerations. A visual representation of the plan helps in visualizing the final installation and in managing the installation process effectively.
- Waste Management: Plan your cutting patterns to minimize waste. Consider the placement of panels to minimize the amount of material that needs to be cut.
Marking and Cutting Hardiplank
Proper marking and cutting of Hardiplank panels are critical for achieving a professional and aesthetically pleasing installation. Accurate cuts ensure a tight fit and prevent gaps or misalignment.
- Using a Pencil and Ruler: Carefully mark the cutting lines on the Hardiplank panel using a pencil and ruler. Ensure the lines are clear and precise to avoid errors in the cutting process.
- Using a Power Saw: Use a power saw equipped with a blade suitable for cutting Hardiplank. This method is crucial for accuracy and safety.
- Cutting Techniques: Cut Hardiplank panels along the marked lines. Use caution to prevent kickback and ensure the cuts are smooth and clean.
Surface Preparation Scenarios
This table articulates different scenarios and the necessary steps for proper surface preparation:
| Surface Condition | Description | Preparation Steps | Important Considerations |
|---|---|---|---|
| Drywall | Common substrate for interior installations. | Clean, repair cracks, and prime. | Ensure proper adhesion of primer. |
| Existing Siding (Wood) | Requires removal of old siding before installation. | Remove old siding, repair damage, and level. | Address any rot or insect infestation. |
| Concrete | A durable substrate may require additional preparation. | Clean, repair cracks, and apply a bonding agent. | Check for unevenness and ensure proper moisture control. |
| Metal | Requires special consideration for bonding. | Clean, repair damage, and apply metal primer. | Use appropriate metal primer for enhanced adhesion. |
Hardiplank Installation Techniques: Hardiplank Installers
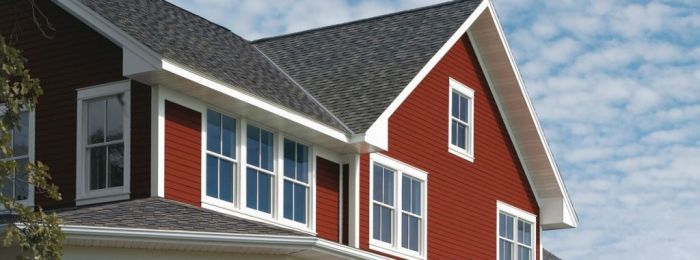
Hardiplank, a popular siding material, offers a durable and aesthetically pleasing exterior finish. Proper installation is crucial for achieving a long-lasting and attractive result. This section details the essential techniques for installing Hardiplank siding, emphasizing correct procedures for various installation methods and substrates.
Orientation and Mounting Methods
Different orientations of Hardiplank, like vertical or horizontal, affect the overall aesthetic and performance of the siding. Proper orientation enhances the visual appeal of the home and contributes to the long-term structural integrity. The best choice depends on the architectural style and desired visual impact.
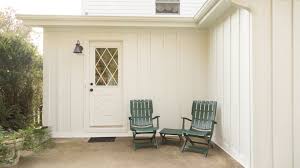
- Vertical Installation: Vertical installation is often preferred for its ability to create a more modern and streamlined look. It can also be more visually appealing on tall structures. This method usually requires more precise cutting and measuring, but the finished look can be striking.
- Horizontal Installation: Horizontal installation, a classic approach, provides a traditional and balanced appearance. It is generally easier to install than vertical installation, requiring less precision in cutting and aligning the panels.
Fasteners and Adhesives
Using the correct fasteners and adhesives is critical for securing Hardiplank to the substrate and ensuring long-term stability. The choice depends on the substrate type and the local climate conditions. Using incorrect fasteners or adhesives can lead to premature failure and damage to the siding.
- Fasteners: For most applications, specialized Hardiplank screws are recommended. These screws are designed to penetrate the Hardiplank’s dense material without causing damage and are engineered to resist moisture and weather conditions. Use galvanized screws for extra corrosion resistance.
- Adhesives: Certain applications may benefit from using an exterior-grade adhesive in conjunction with fasteners. This can provide an extra layer of support and prevent the Hardiplank from shifting over time. Ensure the adhesive is compatible with the substrate and the Hardiplank.
Spacing and Overlapping Techniques
Precise spacing and overlapping are crucial for creating a seamless and watertight installation. These techniques ensure proper ventilation and prevent water penetration, protecting the underlying structure of the home.
- Spacing: Maintain consistent spacing between Hardiplank panels to allow for proper ventilation and expansion. Consult the manufacturer’s specifications for the recommended spacing.
- Overlapping: Overlapping panels at the seams is essential for a watertight installation. The overlapping technique minimizes gaps, preventing water infiltration, and creates a continuous surface.
Flashing and Sealant Techniques
Proper flashing and sealant application are vital to prevent water damage around windows, doors, and other vulnerable areas. These techniques protect the home’s structure from water penetration.
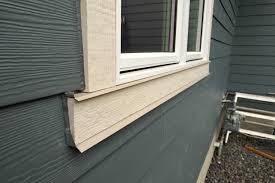
- Flashing: Use appropriate flashing materials, such as metal flashing, around windows, doors, and other penetrations to redirect water away from the Hardiplank. Make sure the flashing is installed correctly to ensure water cannot get behind it.
- Sealant: Apply exterior-grade sealant to all joints, seams, and penetrations to create a watertight barrier. This sealant is designed to withstand the elements and maintain its effectiveness over time.
Securing Hardiplank to Substrates
The method of securing Hardiplank to the substrate depends on the type of wall. Understanding these differences is essential for achieving a watertight and durable installation.
Hardiplank Installation Procedure on Different Wall Types
| Wall Type | Step 1: Preparation | Step 2: Installation | Step 3: Finishing |
|---|---|---|---|
| Wood Frame | Inspect and repair the existing wall. Ensure proper framing is present. | Attach the Hardiplank panels using the recommended fasteners and spacing. | Apply sealant and flashing as needed. |
| Concrete | Ensure the concrete surface is clean and properly prepared. Apply a bonding agent if necessary. | Use specialized concrete anchors and fasteners to secure the Hardiplank. | Apply sealant and flashing at penetrations. |
| Brick | Clean and prepare the brick surface. | Use appropriate fasteners and adhesives for brick. | Apply sealant around the Hardiplank and brick. |
Troubleshooting and Maintenance
Keeping your Hardiplank siding looking its best involves more than just the initial installation. Regular maintenance and a little troubleshooting know-how will ensure your investment lasts for years. Addressing minor issues promptly prevents bigger problems down the road, saving you time and money.
Proper maintenance is key to preventing costly repairs. Identifying potential problems early and implementing simple solutions can significantly extend the lifespan of your Hardiplank siding. This section will Artikel common issues, provide solutions, and emphasize the importance of regular upkeep.
Common Installation Problems and Solutions
Understanding potential issues during installation is crucial. Preemptive action can prevent costly repairs. Recognizing these problems early on can prevent them from escalating into significant structural or aesthetic problems.
| Issue | Description | Solution | Prevention |
|---|---|---|---|
| Cracks or Gaps | Appearance of cracks or gaps between panels. | Carefully inspect the installation. If the problem is due to improper nailing or panel alignment, re-nail or re-align the panels. | Ensure proper nailing techniques and panel alignment during installation. Use appropriate flashing where necessary. |
| Warped or Bowed Panels | Panels appear warped or bowed after installation. | This often indicates improper moisture control during installation or inadequate support. Check for uneven substrates or improper nailing patterns. Rectify the cause of the warping. | Ensure proper moisture control and adequate substrate support. Check for and address uneven substrates before installing Hardiplank. |
| Improper Flashing | Incorrect flashing around windows, doors, or other penetrations. | Re-flash the area using the appropriate flashing materials and techniques. | Use appropriate flashing materials and techniques at all penetrations during installation. |
| Uneven Surface | The surface of the siding is uneven. | Check for uneven substrates and ensure the Hardiplank is correctly aligned and leveled before nailing. | Thoroughly prepare the substrate and ensure the proper leveling of the Hardiplank panels before nailing. |
Importance of Regular Maintenance
Regular maintenance is essential for preserving the aesthetic appeal and structural integrity of your Hardiplank siding. Routine inspections and upkeep can prevent issues from escalating. A proactive approach saves money and ensures long-term satisfaction.
- Regular Inspections: Visual inspections should be conducted periodically. Look for any signs of damage, such as cracks, gaps, or discoloration. Check for any signs of moisture or insect activity.
- Cleaning: Regular cleaning helps to prevent the build-up of dirt and debris that can contribute to premature deterioration. Use a soft brush and mild detergent for cleaning.
- Repairing Damage: Minor damage, such as small cracks or gaps, can be repaired promptly to prevent further deterioration. Use appropriate patching materials for small holes or gaps.
Restoring Damaged Hardiplank Siding
Restoring damaged Hardiplank siding involves careful assessment and repair. The method of repair will depend on the severity of the damage. For minor damage, simple patching may suffice. For more extensive damage, professional assistance might be needed.
- Assess the Damage: Thoroughly inspect the damage. Determine the extent of the damage to determine the best approach.
- Repairing Small Damage: For small cracks or gaps, use a high-quality patching compound designed for exterior use. Apply the compound following the manufacturer’s instructions. Ensure the area is clean and dry before application.
- Replacing Damaged Panels: For larger areas of damage, or if the damage is extensive, consider replacing the damaged Hardiplank panels. It’s best to contact a professional Hardiplank installer for guidance.
Safety Considerations During Hardiplank Installation
Hardiplank installation, while relatively straightforward, requires meticulous attention to safety. Improper procedures can lead to serious injuries, so understanding and consistently applying safety precautions is crucial. This section details the essential safety measures to protect yourself and others throughout the installation process.
Proper safety measures are not just a good idea; they’re a necessity. Accidents can happen quickly and easily, and the consequences can be severe. Following the guidelines in the article below will help you minimize risks and ensure a safe working environment.
Essential Safety Gear
Safety is paramount during any construction project, especially when working with materials like Hardiplank. Appropriate personal protective equipment (PPE) is vital for preventing injuries.
- Safety glasses or goggles are essential to protect your eyes from flying debris, splinters, or other hazards during handling and cutting. This includes potential impacts from dropped materials.
- Construction gloves are crucial for protecting your hands from cuts, scrapes, and abrasions. Hardiplank can be sharp and rough, requiring the use of gloves for safe handling.
- Hearing protection is recommended if power tools are used. Construction sites can be noisy, and prolonged exposure can lead to hearing loss. Earmuffs or earplugs should be used.
- Work boots or sturdy shoes with good ankle support are critical for maintaining stability, particularly on uneven or sloped surfaces. This is vital for preventing slips, trips, and falls.
Handling Hardiplank Materials Safely
Careful handling of Hardiplank sheets is essential to avoid injuries. These materials, while sturdy, can still cause harm if not managed correctly.
- Use proper lifting techniques. Avoid lifting heavy sheets by yourself. Always use appropriate lifting equipment or ask for assistance. Using a team to lift and position the sheets reduces the risk of injury significantly.
- Transport sheets carefully. Use carts or dollies to move Hardiplank sheets to prevent slipping or dropping. Always have a clear path, and avoid overloading the cart or dolly.
- Store sheets safely. Keep sheets stacked properly and off the ground to prevent damage and injury. Ensure the stack is stable, preventing collapses that could cause harm.
Working at Heights
Working at heights presents unique safety challenges. Falls from heights are a significant risk in construction, and proper precautions are necessary.
- Always use a ladder or scaffold that is properly rated for the weight and height. Check for stability and secure footing before using.
- Wear a safety harness and use fall arrest systems when working at heights. These systems are critical for preventing serious injury in case of a fall.
- Have a spotter or a coworker to assist you, especially when moving around or working at heights. A spotter provides an extra level of security.
- Clear the area below the work site. Remove any potential hazards that could be struck or hit by falling objects.
Required Safety Equipment
A comprehensive list of safety equipment is essential for a safe Hardiplank installation.
- Safety glasses or goggles
- Construction gloves
- Work boots or sturdy shoes
- Hearing protection (earmuffs or earplugs)
- Safety harness and fall arrest system (if working at heights)
- Lifting equipment (e.g., dollies, carts)
- Ladder or scaffold (properly rated)
- First-aid kit
- Spotter (when working at heights)
Estimating Costs and Materials
Figuring out the total cost for a Hardiplank installation is crucial for planning and budgeting. Knowing the factors that influence pricing helps you get accurate quotes and avoid unpleasant surprises later. This section details how to estimate materials and labor costs, emphasizing the importance of getting multiple quotes.
Factors Affecting Hardiplank Installation Costs
Several factors significantly impact the final cost of a Hardiplank installation. Project size, complexity, and location all play a role. The size of the area to be covered, the type of Hardiplank chosen (different thicknesses and styles have different costs), and the required preparation work all contribute to the overall expense. Additionally, the condition of the existing structure and any necessary repairs or modifications will affect the cost. The availability of materials and labor rates in the specific region also factor into the final price.
Typical Hardiplank Material Costs
Hardiplank siding costs vary depending on the specific product chosen. A common range for Hardiplank lap siding is between $5 and $15 per square foot. However, this can fluctuate based on the specific size, color, and thickness. For example, a more complex or specialty design will likely be higher. Consider adding costs for accessories like flashing, trim, and other related materials. Always request detailed material pricing from potential installers to get an accurate picture of the total cost.
Estimating Labor Costs for Hardiplank Installation
Estimating labor costs for Hardiplank installation involves considering several factors. The size of the project, the complexity of the installation (e.g., multiple levels, curved surfaces), and the required preparation work all impact the hours of labor needed. A skilled installer will take into account all these variables when estimating the labor time. A rough estimate for a simple, straightforward installation could be $25 to $50 per hour. However, these are general guidelines. Always request a detailed breakdown of labor costs from potential installers.
Importance of Obtaining Multiple Quotes
Getting multiple quotes for Hardiplank installation is essential for getting the best possible value. Different contractors will have varying pricing structures based on their overhead, labor rates, and material sources. Comparing quotes allows you to understand the market rate and identify any potentially inflated costs. By comparing several quotes, you can select the most competitive and suitable option for your project.
Breakdown of Material and Labor Costs for Different Projects
| Project Description | Estimated Material Cost (per sq ft) | Estimated Labor Cost (per sq ft) | Estimated Total Cost (per sq ft) |
|---|---|---|---|
| Small, simple house siding (1000 sq ft) | $8-12 | $15-25 | $23-37 |
| Mid-sized home with complex features (1500 sq ft) | $9-15 | $20-35 | $29-50 |
| Large commercial building (5000 sq ft) | $10-18 | $25-45 | $35-63 |
Note: These are estimates only and may vary depending on specific project requirements and local factors.
Final Thoughts
In summary, installing Hardiplank requires careful planning, skilled execution, and meticulous attention to safety. From selecting the right installer to mastering installation techniques and addressing potential issues, this guide equips you with the knowledge needed to navigate the entire process effectively. Remember to prioritize safety, choose reputable installers, and thoroughly prepare your surface to ensure a beautiful and durable Hardiplank installation that stands the test of time. Ultimately, understanding these critical factors will help you achieve a superior final result.