Installing Engineered Wood Siding A Comprehensive Guide
Installing engineered wood siding is a rewarding home improvement project. This comprehensive guide walks you through every step, from initial preparation to final finishing touches. We’ll explore the various types of engineered wood siding materials, detailing their manufacturing processes and highlighting their advantages over traditional wood siding. We’ll also cover installation procedures, essential preparation steps, and crucial factors influencing installation quality.
The guide delves into maintenance and troubleshooting, offering practical tips to ensure long-term performance. Design and aesthetic considerations, along with cost breakdowns, are also addressed. Whether you’re a seasoned DIY enthusiast or a first-time homeowner, this guide equips you with the knowledge to tackle this project confidently.
Introduction to Engineered Wood Siding
Engineered wood siding offers a compelling alternative to traditional wood siding, blending the aesthetic appeal of natural wood with enhanced durability and performance. Its manufactured nature allows for greater control over material properties, resulting in a more consistent and predictable product. This approach also often reduces the impact on natural resources, compared to using solid wood. Understanding the various types, manufacturing processes, and comparative advantages is crucial for homeowners seeking a long-lasting and attractive exterior finish.
Definition of Engineered Wood Siding
Engineered wood siding is a composite material designed to mimic the appearance of natural wood siding while incorporating added strength and resilience. It’s typically constructed from a combination of wood fibers, resins, and other additives, forming a stable and dimensionally consistent panel. This engineered nature often allows for a wider range of colors, textures, and finishes than traditional wood siding.
Types of Engineered Wood Siding Materials
Several different materials are used in the creation of engineered wood siding. Common examples include:
- Wood-fiber composites: These are formed by combining wood fibers with binders and other additives. The resulting panels are often more resistant to moisture and decay than solid wood, and can be manufactured in various thicknesses and profiles to match traditional wood siding styles.
- Oriented strand board (OSB) siding: OSB is another popular option. Engineered with wood strands bonded together under high pressure, OSB siding panels offer a robust and cost-effective alternative to traditional wood, providing excellent structural integrity.
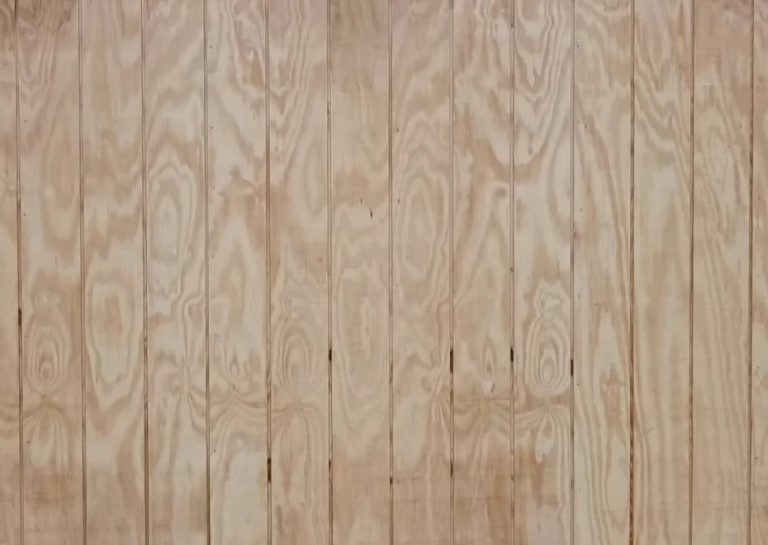
- Plywood siding: Engineered from thin layers of wood glued together, plywood siding is known for its dimensional stability. This makes it less prone to warping or shrinking, and often offers better resistance to moisture and rot compared to traditional wood siding.
Manufacturing Processes
The manufacturing process for engineered wood siding varies depending on the specific material. However, common steps include:
- Preparation of wood fibers or strands: The raw wood material is processed into smaller pieces or fibers. This ensures uniform material for better bonding and dimensional consistency.
- Adding binders and additives: Resins, adhesives, and other additives are mixed with the wood fibers to create a cohesive composite material.
- Forming and pressing: The mixture is molded into panels or boards, often with the desired thickness and profile. High pressure and heat are often used to achieve the final form and ensure proper bonding.
- Finishing: A final surface treatment is applied, such as painting, staining, or sealing. This protects the material from environmental factors like moisture and UV radiation.
Advantages and Disadvantages
Engineered wood siding offers several advantages over traditional wood siding:
- Durability and Longevity: Engineered wood siding is generally more resistant to moisture, rot, and decay, leading to a longer lifespan.
- Uniformity and Dimensional Stability: The manufacturing process creates a more consistent product, minimizing variations in size and shape, leading to a cleaner and more precise installation.
- Reduced Maintenance: Engineered wood siding typically requires less maintenance than traditional wood siding, as it is less susceptible to weather damage and insect infestation.
However, there are also some disadvantages to consider:
- Cost: Engineered wood siding can sometimes be more expensive than traditional wood siding, depending on the specific material and the manufacturer.
- Appearance: While often mimicking the look of natural wood, the appearance might not be identical in all cases.
Comparison with Traditional Wood Siding
| Feature | Engineered Wood Siding | Traditional Wood Siding |
|---|---|---|
| Cost | Generally higher than vinyl, but often less expensive than cedar or redwood | Variable, depending on the wood type (e.g., cedar, redwood) |
| Installation | Relatively straightforward, with faster installation times possible due to consistent panel sizes. | It can be more labor-intensive due to wood variations. |
| Maintenance | Lower maintenance, less susceptible to rot and decay | Requires regular staining and sealing to protect from moisture and insects. |
| Durability | Generally higher durability and resistance to weather elements | Susceptible to moisture damage, decay, and insect infestation. |
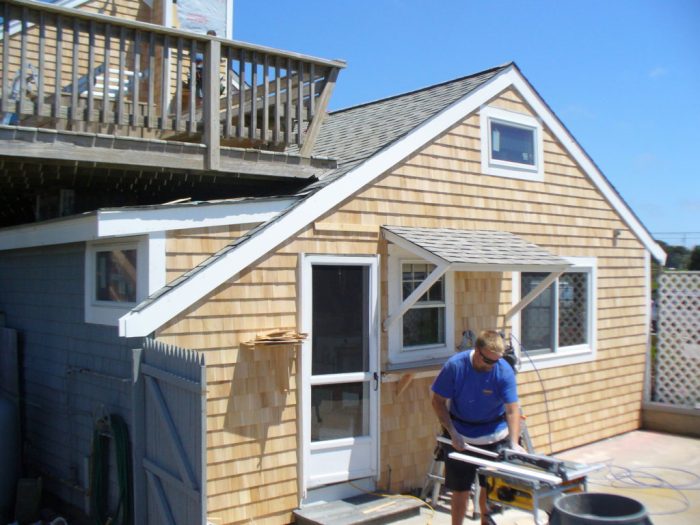
Installation Preparation
Source: angi.com
Proper preparation is the cornerstone of a successful engineered wood siding installation. A well-prepared surface ensures a strong, long-lasting bond between the siding and the wall, minimizing the risk of future issues like warping, cracking, or premature deterioration. This section details the necessary tools, materials, and steps for meticulous surface preparation.
Essential Tools and Materials
A comprehensive toolkit is crucial for efficient and quality installation. This includes not only the tools for cutting and fastening but also those for surface preparation. Having the right tools ensures a precise and controlled installation, leading to a better finished product.
- Measuring tape, level, pencil, and utility knife for precise measurements and markings.
- Power drill with appropriate drill bits for fastening siding components.
- Circular saw or reciprocating saw for cutting engineered wood siding to size.
- Safety glasses, work gloves, and a dust mask are essential for personal protection during the installation process.
- Various types of fasteners, such as nails, screws, or specialized siding clips, tailored to the specific siding material and fastening method.
- Caulk and sealant for sealing gaps and preventing moisture intrusion.
Wall Surface Preparation
Thorough preparation of the wall surface is paramount for optimal siding performance. This involves inspecting the existing wall, addressing any issues, and ensuring a clean, stable foundation for the siding. Proper surface preparation is crucial for long-term durability and aesthetic appeal.
- Inspect the existing wall for any damage, such as cracks, holes, or loose or missing sections. Repair any damage before proceeding with the installation.
- Clean the wall surface thoroughly, removing any loose debris, dirt, or old paint. Ensure the surface is free of any contaminants that might hinder proper adhesion.
- If the wall surface is not smooth or level, apply a layer of appropriate wall patching compound to fill in any gaps or irregularities, ensuring a level surface. Allow ample time for the compound to dry completely.
- Apply a primer to the wall surface, especially if the existing wall is painted or contains materials that may not properly bond with the siding. Priming improves the adhesion of the siding and enhances its longevity.
Importance of Surface Preparation
Proper surface preparation significantly impacts the long-term performance of the engineered wood siding. A properly prepared surface ensures that the siding adheres firmly to the wall, resisting moisture penetration, preventing damage from pests, and promoting a more aesthetically pleasing finish. This leads to a siding system that lasts for years with minimal maintenance.
Surface preparation is not just a step; it’s a critical factor in achieving a durable and aesthetically pleasing installation.
Pre-Installation Checklist
This checklist will help ensure a smooth and efficient installation process, reducing potential errors and delays.
- Verify that all necessary tools and materials are available and in good working order.
- Inspect the wall surface for any existing damage and make necessary repairs.
- Ensure the wall surface is clean, dry, and properly prepared for siding application.
- Review the manufacturer’s instructions for the specific engineered wood siding product.
- Confirm that the installation is aligned with local building codes and regulations.
Common Tools and Materials
The following table lists the essential tools and materials for engineered wood siding installation.
| Item | Description |
|---|---|
| Measuring Tape | Accurate measurement of wall dimensions |
| Level | Ensuring a level installation |
| Pencil | Marking measurements and lines |
| Utility Knife | Cutting and trimming siding |
| Power Drill | Fastening siding components |
| Circular Saw | Cutting engineered wood siding to size |
| Reciprocating Saw | Cutting engineered wood siding to size |
| Safety Glasses | Eye protection |
| Work Gloves | Hand protection |
| Dust Mask | Protecting from airborne particles |
| Fasteners (nails, screws, clips) | Securing the siding to the wall |
| Caulk/Sealant | Sealing gaps and preventing moisture |
| Primer | Enhancing adhesion and longevity |
| Wall Patching Compound | Filling gaps and irregularities |
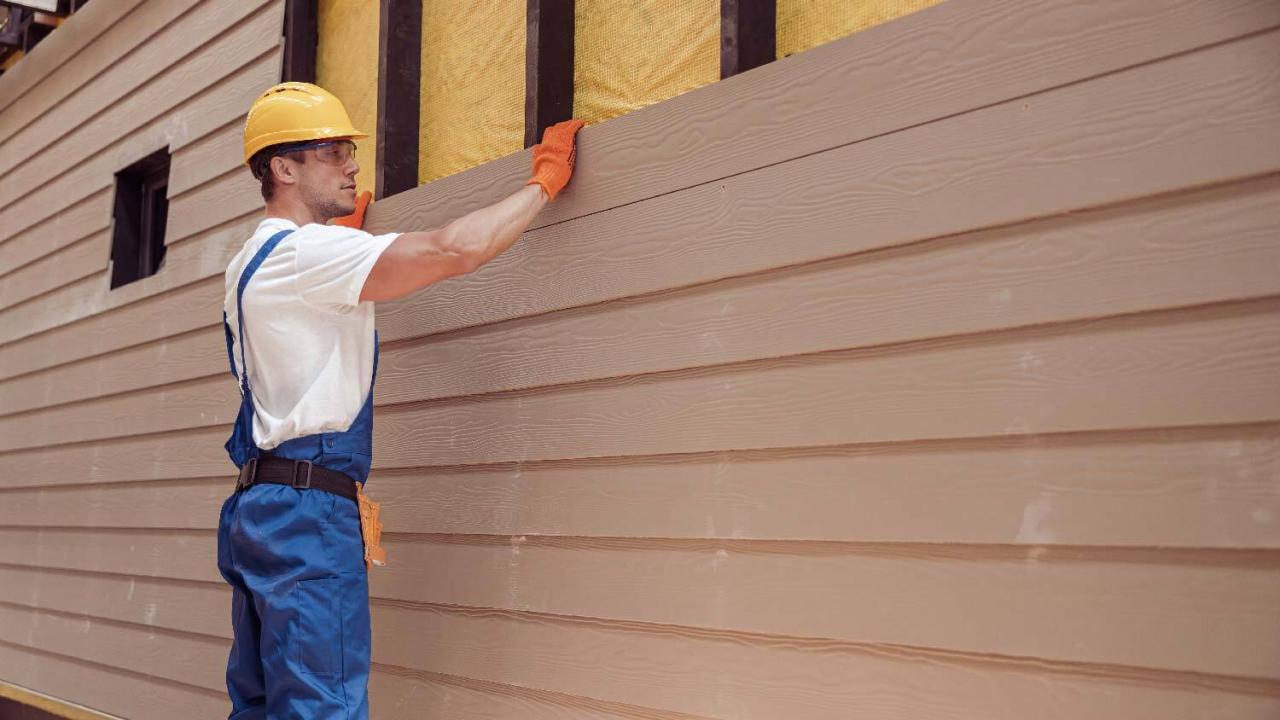
Installation Procedures
Installing engineered wood siding requires meticulous attention to detail and adherence to proper techniques to ensure a durable and aesthetically pleasing final product. This section provides a comprehensive guide to the installation process, covering essential steps, fastening methods, and common pitfalls to avoid.
Proper installation of engineered wood siding is crucial for long-term performance. Ignoring critical steps can lead to premature damage, leaks, and costly repairs. This detailed guide will equip you with the knowledge to confidently complete the installation process.
Fastening Methods
Different fastening methods offer varying levels of strength and aesthetic appeal. The optimal choice depends on the specific siding material, wall structure, and desired aesthetic.
- Nail Fastening: Nails are a common and relatively straightforward fastening method, especially for thinner siding panels. Choose nails that are appropriate for the siding material and the supporting structure to avoid splitting or damaging the wood. Proper nail placement and hammering technique are crucial for achieving a secure and aesthetically pleasing installation. For instance, using galvanized nails helps prevent rusting, extending the life of the installation.
- Screw Fastening: Screws provide a more secure fastening method compared to nails, particularly for thicker siding panels. Using appropriate screws with the correct head style ensures optimal performance. Proper pilot holes, pre-drilled in the wall, prevent wood splitting and ensure a consistent, durable fastening. Using self-drilling screws further simplifies the process.
- Adhesive Fastening: Certain engineered wood siding panels are designed for adhesive installation. The application of a suitable adhesive, following the manufacturer’s guidelines, provides a strong and watertight bond. Careful application and proper curing time are essential to achieve optimal adhesion. This method is often suitable for siding on more complex wall structures or for achieving a tighter seal.
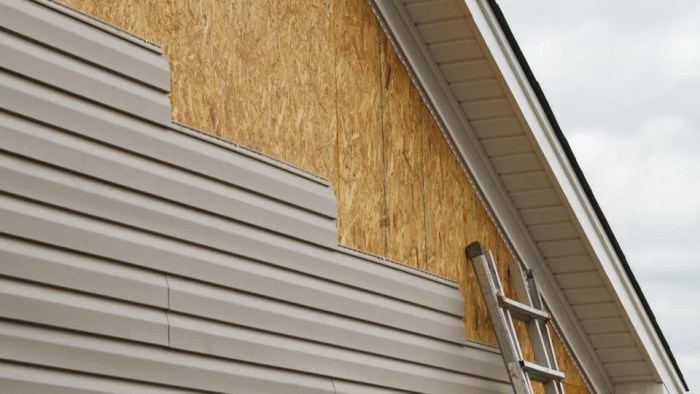
Securing the Siding to the Wall, Installing engineered wood siding
Properly securing the siding to the wall is critical for its structural integrity and longevity. Incorrect installation can lead to gaps, moisture intrusion, and eventual damage.
- Wall Preparation: Ensure the wall is clean, dry, and free from debris. Any imperfections or damage to the wall should be repaired before installation. Proper preparation will result in a smooth and uniform finish.
- Flashing and Sealants: Use appropriate flashing and sealants to protect areas where the siding meets other components, such as windows, doors, or rooflines. This step prevents water intrusion and maintains the integrity of the installation. Using weatherproof sealant guarantees long-term protection.
- Spacing and Overlap: Maintain the recommended spacing between siding panels and ensure proper overlaps to achieve a watertight seal. Following these guidelines is crucial for the structural integrity and longevity of the siding.
- Proper Attachment: Use the selected fastening method correctly, ensuring that fasteners are inserted at the designated points and depths. Incorrect attachment can lead to instability and potential damage.
Common Mistakes to Avoid
Several mistakes can compromise the integrity and longevity of the engineered wood siding installation. Understanding and avoiding these pitfalls is essential for a successful project.
- Inadequate Wall Preparation: Failure to adequately prepare the wall can lead to uneven or unstable siding installation. Thorough cleaning, repair, and priming are critical steps that cannot be overlooked.
- Incorrect Fastening Method: Using the wrong fasteners or inadequate techniques can result in a weak and potentially damaged installation. Selecting appropriate fasteners for the siding material is essential for long-term performance.
- Insufficient Spacing or Overlap: Ignoring proper spacing and overlap can lead to water infiltration and structural issues. Adherence to manufacturer recommendations is vital for a watertight seal.
- Ignoring Flashing and Sealants: Omitting flashing and sealants around penetrations and transitions can cause leaks and premature damage. Proper application of these materials is a crucial step for preventing moisture issues.
Factors Affecting Installation Quality

Engineered wood siding, while offering aesthetic appeal and durability, requires meticulous installation to achieve optimal results. Several factors significantly impact the quality of the finished product, from environmental conditions to the choice of materials and installation methods. Understanding these factors is crucial for achieving a long-lasting and aesthetically pleasing installation.
Impact of Weather Conditions
Weather conditions play a critical role in the success of engineered wood siding installation. Extreme temperatures, heavy rainfall, and strong winds can compromise the integrity of the siding and the underlying structure. Installation should ideally occur during stable weather, avoiding periods of high heat, freezing temperatures, or prolonged rain. For instance, installing siding during a heat wave could lead to warping or cracking, while excessively wet conditions can compromise adhesive bonds. Adequate site preparation and careful material handling are essential to mitigate the impact of adverse weather.
Importance of Correct Fasteners
Using the appropriate fasteners is paramount for a secure and durable installation. Different siding types and thicknesses require specific fastener types, sizes, and spacing. Improper fastener selection can lead to premature failure of the siding, potentially causing significant damage and requiring costly repairs. For instance, using insufficiently long screws or nails for thicker siding will result in inadequate penetration and holding power. Adhering to manufacturer recommendations for fasteners is essential for achieving a strong and lasting installation.
Role of Ventilation and Drainage
Proper ventilation and drainage are critical in preventing water damage to the siding and underlying structure. Adequate air circulation prevents moisture buildup, which can lead to rot, mildew, and insect infestation. Correct drainage prevents water from pooling against the siding, reducing the risk of water damage and structural issues. Ensure that the siding is installed to allow proper air circulation and that the structure has effective drainage systems to channel water away from the siding. Examples of proper ventilation include using appropriately sized gaps between siding boards and the underlying structure, ensuring proper flashing and sealing at junctions and corners.
Comparison of Installation Methods
Different installation methods offer varying advantages and disadvantages. The most common method involves using adhesive and fasteners. This approach offers good holding power but requires meticulous preparation and precise application of adhesive. Alternatively, some methods employ nailing or screwing into the sheathing, which is faster but might not provide the same level of water resistance. The choice of method depends on the specific siding type, the structure’s characteristics, and the installer’s expertise. Each method must be carefully considered for its strengths and weaknesses.
Potential Installation Issues and Solutions
| Potential Issue | Solution |
|---|---|
| Improper fastener selection | Consult manufacturer recommendations for appropriate fastener type, size, and spacing. |
| Water damage due to inadequate drainage | Ensure proper drainage systems and flashing are in place. |
| Warped or cracked siding due to extreme temperatures | Install siding during stable weather conditions, avoiding periods of high heat or freezing temperatures. |
| Insufficient air circulation | Ensure proper gaps between siding boards and the underlying structure. |
| Inadequate adhesive application | Follow the manufacturer’s instructions for adhesive application and curing times. |
Maintenance and Troubleshooting
Engineered wood siding, while durable, requires ongoing care to maintain its aesthetic appeal and longevity. Proper maintenance significantly extends the lifespan of the siding and minimizes potential issues. This section details essential maintenance steps, common problems, and proactive measures to prevent damage.
Engineered wood siding, like natural wood, is susceptible to weathering and environmental factors. Regular inspections and preventative measures are key to preserving its beauty and structural integrity. Addressing issues promptly can prevent small problems from escalating into costly repairs.
Essential Maintenance Steps
Regular cleaning and inspections are vital for maintaining the condition of engineered wood siding. Thorough cleaning removes accumulated dirt, debris, and algae, preserving the siding’s color and preventing the growth of mold or mildew. Routine inspections identify potential issues early, enabling prompt repairs and minimizing future damage.
- Cleaning: Use mild soap and water for cleaning. Avoid harsh chemicals or abrasive scrubbers that can damage the siding’s surface. High-pressure washing can be effective, but should be done carefully to avoid damaging the siding or underlying structure.
- Inspection: Periodically inspect the siding for any signs of damage, such as cracks, gaps, or loose fasteners. Check for signs of insect infestation or moisture damage. Pay attention to areas that might be susceptible to moisture buildup.
Addressing Common Issues
Identifying and addressing common problems promptly is crucial for maintaining the siding’s integrity. A proactive approach prevents minor issues from becoming major concerns.
- Moisture Damage: Water intrusion can lead to rot, warping, and mold growth. Promptly address leaks, clogged gutters, and improper drainage to prevent moisture from accumulating behind the siding.
- Insect Infestation: Inspect the siding for signs of insect activity, such as holes, droppings, or galleries. If infestation is detected, professional pest control is recommended to prevent further damage.
- Cracks or Gaps: Address cracks or gaps in the siding promptly to prevent further damage and water infiltration. Repairing these issues can prevent the progression of decay and deterioration.
- Loose Fasteners: Regularly check for loose fasteners and ensure they are tightened to maintain the siding’s structural integrity. This prevents the siding from becoming detached or shifting.
Long-Term Maintenance Requirements
The long-term maintenance of engineered wood siding involves ongoing attention to detail. Proactive measures prevent significant damage and extend the siding’s life.
- Regular Inspections: Schedule annual inspections to identify and address potential problems before they escalate.
- Protective Treatments: Apply sealant or other protective coatings periodically to protect the siding from weathering, UV exposure, and moisture damage.
- Preventive Measures: Ensure proper ventilation and drainage to prevent moisture buildup and potential damage to the siding and underlying structure.
Preventing Damage
Taking preventative measures can significantly reduce the likelihood of damage to engineered wood siding. Early intervention is crucial to avoiding costly repairs and preserving the siding’s aesthetic appeal.
- Protecting from Moisture: Maintain proper drainage around the home, ensuring water flows away from the foundation and siding. Check and clean gutters regularly.
- Insect Control: Use pest control measures to prevent insect infestations. Regular inspections are essential to detect and address problems early.
- UV Protection: UV rays can fade the siding over time. Applying protective coatings can minimize the effects of prolonged exposure to sunlight.
Maintenance Task Frequency Table
Task Frequency
Cleaning Quarterly
Inspection Bi-annually
Fastener Check Annually
Protective Coating Application Every 2-3 Years
Pest Control As Needed
Gutter Cleaning Spring and Fall
Design and Aesthetic Considerations: Installing Engineered Wood Siding
Engineered wood siding offers a wide array of design possibilities, allowing homeowners to tailor the aesthetic of their building to their preferences and the architectural style. Proper consideration of color, pattern, and texture, in conjunction with the overall building design, significantly enhances the visual appeal and value of a home.
Careful selection of siding materials plays a crucial role in the overall architectural expression. Matching the siding to the existing architectural design, while incorporating desired aesthetics, can significantly improve the curb appeal and value of a property.
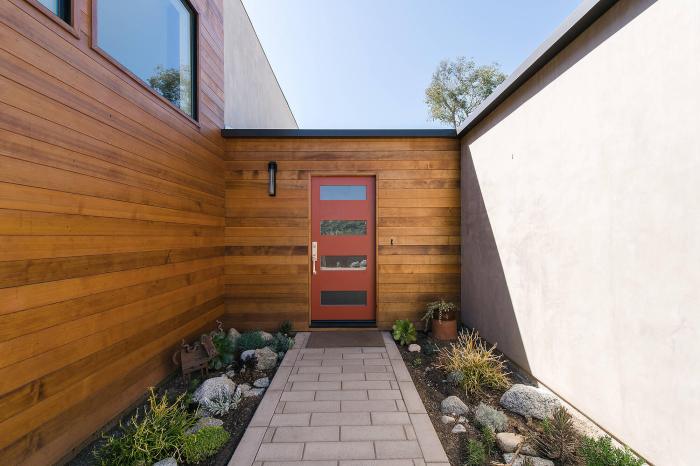
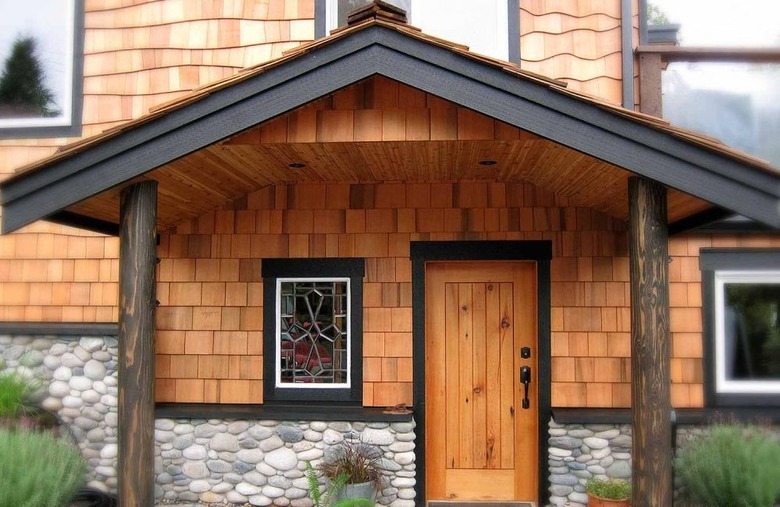
Design Options for Various Building Styles
Different architectural styles benefit from different siding choices. Traditional homes, for example, often look best with a classic wood grain pattern, while modern homes may favor a smooth, contemporary look. Craftsman-style homes often look good with wider plank siding or shiplap siding, while a colonial-style house might be better suited to vertical siding. The selection should be made thoughtfully and deliberately to complement the overall architectural theme.
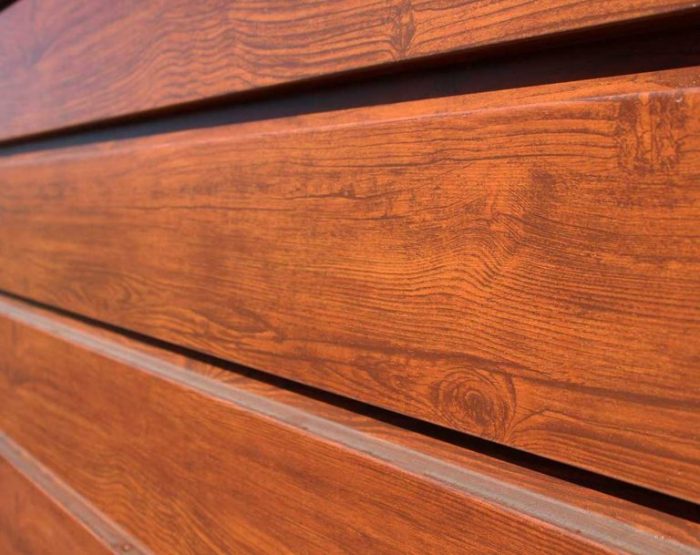
Colors and Finishes
A wide range of colors and finishes is available for engineered wood siding. These options include various shades of natural wood tones, as well as a variety of painted or stained finishes. Consider the surrounding environment and the desired mood when selecting the color. Darker colors can create a more dramatic look, while lighter colors reflect more light and create a brighter ambiance. Consider factors such as the local climate, the surrounding landscape, and the desired overall tone when making a choice.
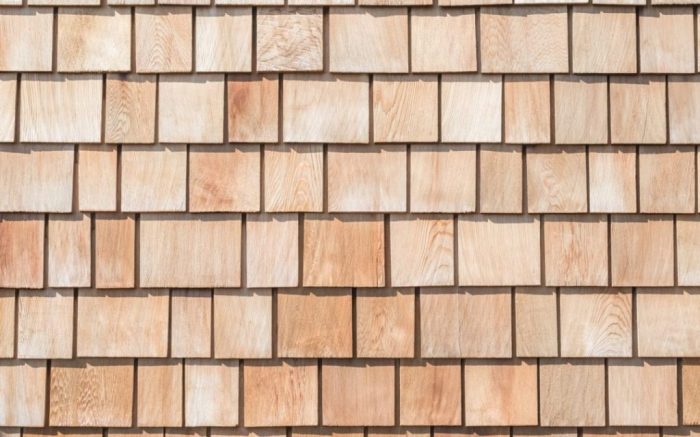
Siding Patterns and Textures
Engineered wood siding comes in a range of patterns and textures. Common patterns include horizontal, vertical, and staggered styles. Textures can vary from smooth and sleek to rustic and distressed, allowing for diverse aesthetic expression. Consider the size of the building and the surrounding landscape when selecting a pattern. Larger buildings often benefit from a wider plank or more elaborate pattern, while smaller homes may look better with a simpler design. The desired effect should be a cohesive and harmonious blend.
Matching Siding to Architectural Design
Matching the siding to the overall architectural design is paramount. The choice should be made with an eye towards visual harmony. For example, a house with prominent gables or decorative trim may benefit from siding with a more intricate pattern. A simple, modern home, on the other hand, might be enhanced by a sleek, smooth siding. The goal is to create a visually pleasing and harmonious exterior that enhances the building’s architectural character.
Examples of Engineered Wood Siding Colors and Patterns
| Color | Pattern | Architectural Style Suggestion |
|---|---|---|
| Warm Gray | Horizontal | Craftsman, Contemporary |
| Light Beige | Vertical | Colonial, Traditional |
| Dark Brown | Shiplap | Craftsman, Farmhouse |
| Charcoal Gray | Staggered | Modern, Contemporary |
| Natural Oak | Plank | Traditional, Farmhouse |
Cost and Budget Considerations
Engaged wood siding offers a visually appealing and durable exterior finish. However, understanding the associated costs is crucial for successful project planning. This section delves into the financial aspects of engineered wood siding installations, providing a comprehensive overview of material and labor expenses and comparing them to other siding options.
Average Cost of Engineered Wood Siding Materials
The cost of engineered wood siding materials varies significantly based on the specific type of wood, grade, and manufacturer. Premium grades and exotic woods command higher prices. Expect to pay between $5 and $15 per square foot for materials, depending on the chosen species and features.
Breakdown of Installation Costs
Installation costs for engineered wood siding are a substantial portion of the overall project budget. Factors such as labor rates, complexity of the design, and required preparation work influence these costs. Detailed breakdowns of installation costs often include:
- Labor costs: These are directly related to the number of hours required for installation, which depend on factors such as siding complexity and the size of the project. Experienced installers charge higher rates compared to less experienced individuals.
- Preparation materials This includes materials such as fasteners, flashing, and caulking, which are necessary for a secure and watertight installation. These costs can range from a few dollars to a few hundred dollars per job.
- Subcontractor costs: If additional expertise is needed, like for specialized framing or roofing repairs, their costs will be added to the budget. These are particularly important for complex installations.
- Permitting and inspections: Depending on local regulations, permits and inspections might be required, adding to the project’s overall cost.
Comparison with Other Siding Options
Engineered wood siding, while attractive, typically falls in the mid-range price category when compared to other siding materials. Vinyl siding tends to be more affordable, but it may not match the aesthetic appeal or longevity of engineered wood. Fiber cement siding offers superior durability but comes with a higher upfront cost. A detailed cost comparison should consider not only the material cost but also long-term maintenance and potential repair expenses.
Creating a Budget for Engineered Wood Siding Projects
A comprehensive budget for an engineered wood siding project requires careful planning and estimation. It should include:
- Detailed material cost estimates: This involves calculating the total square footage of the siding required and referencing current market pricing for the chosen materials.
- Labor cost estimations: Consulting with contractors and obtaining quotes from multiple installers is essential for accurate labor cost estimations. Factor in the complexity of the job and the location’s labor costs.
- Contingency fund: Building a contingency fund to account for unexpected expenses is crucial for any major project. This allows for adjustments and unforeseen issues.
- Permitting and inspection fees: These costs should be researched and included to ensure compliance with local regulations.
Estimated Costs for Different Siding Sizes and Complexities
| Siding Size (sq ft) | Complexity (Simple/Moderate/Complex) | Estimated Material Cost ($) | Estimated Labor Cost ($) | Estimated Total Cost ($) |
|---|---|---|---|---|
| 100 | Simple | 500-750 | 1500-2000 | 2000-2750 |
| 200 | Moderate | 1000-1500 | 3000-4000 | 4000-5500 |
| 300 | Complex | 1500-2250 | 4500-6000 | 6000-8250 |
Note: These are estimated costs and may vary based on specific project details and regional pricing.
Summary
In conclusion, installing engineered wood siding involves careful planning, meticulous preparation, and precise execution. This guide has provided a thorough overview of the entire process, from understanding the different types of engineered wood siding to navigating the various installation procedures and maintenance considerations. By following the steps in Artikeld, you can confidently undertake this project, achieving a beautiful and durable finish for your home. Ultimately, a well-installed engineered wood siding system enhances the aesthetic appeal and value of your property.