James Hardie Siding Installers Near Me Your Guide
James Hardie siding installers near me are crucial for a successful project. Finding the right installer ensures your home gets the best quality work and the perfect look. This guide walks you through everything from finding reliable installers to understanding installation costs and maintaining your new siding.
Choosing the right James Hardie siding installer is a critical step in transforming your home’s exterior. The process involves careful research, evaluation, and comparisons to make an informed decision. This guide covers all the essentials, from initial search strategies to the final installation and beyond.
Introduction to James Hardie Siding Installers

Source: remembermeroofing.com
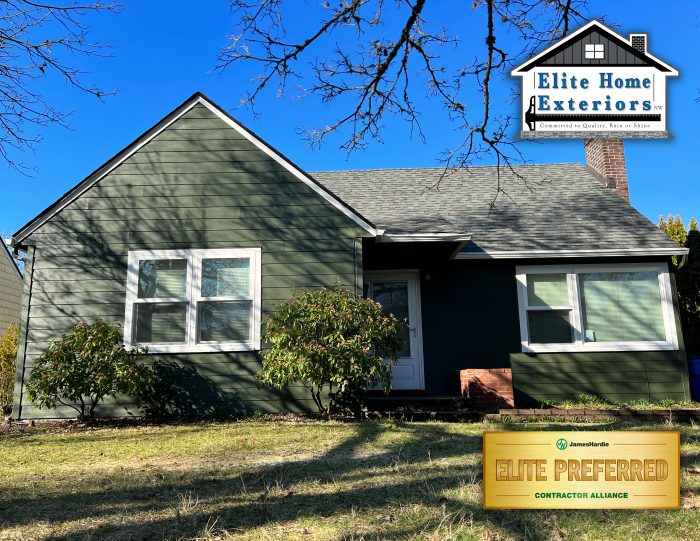
James Hardie siding is a popular choice for homeowners looking for durable, attractive, and low-maintenance exterior cladding. Made from fiber cement, it’s highly resistant to rot, insects, fire, and moisture damage, making it a long-term investment. This material’s strength and resilience translate to a significant return on your home’s value.
Choosing the right James Hardie siding installer is crucial for a successful and lasting installation. A qualified installer ensures the siding is correctly installed, maximizing its lifespan and aesthetics. Proper installation prevents future issues like leaks, water damage, and structural problems. Finding the right professional ensures your home is protected and looks its best for years to come.
Hiring a James Hardie Siding Installer
Finding the right siding installer is a multi-step process. Start by gathering quotes from several licensed and insured contractors. Compare not only prices but also their experience, certifications, and references. Thorough research and careful evaluation of potential installers are key to a successful project.
Choosing a Qualified Installer
Selecting a qualified James Hardie siding installer is essential. Look for installers with experience working with James Hardie siding. Certifications and licenses are important indicators of expertise and adherence to industry standards. Read reviews from previous clients, and if possible, visit homes with recently installed James Hardie siding to assess the quality of the work. Check for any warranties offered. This ensures the installer understands the specifics of the material and installation procedures. A qualified installer will handle the project from start to finish, from measurements and planning to final cleanup. This ensures the project proceeds smoothly and efficiently.
Common Questions About James Hardie Siding Installation
Homeowners often have questions about the installation process. Understanding the steps involved in James Hardie siding installation is essential for a smooth and successful project.
- How long does the installation process typically take? Installation times vary depending on the size of the home and the complexity of the project. A typical installation for a medium-sized home could take anywhere from a few days to a week. Factors such as weather conditions, material availability, and the installer’s workload may affect the timeframe.
- What are the costs associated with James Hardie siding installation? The cost of James Hardie siding installation depends on several factors, including the size of the home, the type of siding used, the complexity of the project, and labor costs in your area. You should get detailed estimates from several contractors before making a decision.
- What are the potential issues with James Hardie siding installation? Poorly installed siding can lead to various problems, including water damage, structural issues, and compromised aesthetics. Hiring a qualified and experienced installer is crucial to prevent these problems.
- What is the warranty on James Hardie siding? James Hardie siding comes with a manufacturer’s warranty. The warranty covers defects in materials and workmanship. Consult with the installer and James Hardie directly for detailed information about the warranty terms.
Finding Installers Near Me
Finding the right James Hardie siding installer is crucial for a successful and beautiful project. Choosing a qualified installer ensures proper installation, which is vital for the longevity and aesthetic appeal of your home’s exterior. This section will guide you through the process of locating reputable installers in your area.
Locating Installers in Your Area
Finding installers near you is straightforward. Start by using online search engines, which can help you narrow your search to specific geographical areas. You can also utilize online directories specializing in home improvement services, providing a comprehensive list of potential installers.
Identifying Reputable Installers
Several factors help identify a reputable installer. Look for installers with a proven track record and positive reviews. An established company with a clear business structure and experience in James Hardie siding installations is a good indicator of its competence. Check their licenses and insurance to ensure they operate legally and are protected against potential accidents or issues during the installation process.
Online Reviews and Testimonials
Online reviews and testimonials provide valuable insights into an installer’s performance. Read reviews from previous clients to understand their experiences, both positive and negative. Look for consistent feedback highlighting quality work, timely completion, and professional communication. These reviews often give a realistic picture of the installer’s work ethic and reliability.
Using Online Search Engines for Local Installers
Online search engines like Google, Bing, or DuckDuckGo are excellent tools for locating local James Hardie siding installers. Enter search terms like “James Hardie siding installers near me” or “James Hardie siding contractors [your city],” and refine your results by adding specific areas or neighborhoods. Filtering by distance or location is also helpful.
Comparing Installer Finding Methods
| Method | Pros | Cons |
|---|---|---|
| Online Directories | Comprehensive listings, often with contact information and reviews. | May include less reputable installers; requires careful screening. |
| Referrals | Trusted recommendations from friends, family, or neighbors. | Limited perspective; may not cover a broad range of installers. |
| Local Ads (e.g., newspapers, community boards) | Direct contact with local installers often offers immediate access. | Information may be outdated or less detailed compared to online resources. |
Evaluating Potential Installers

Finding the right James Hardie siding installer is crucial for a successful project. Poor installation can lead to costly repairs and a less-than-desirable final product. Thorough evaluation of potential installers is key to avoiding these problems.
Careful selection of a contractor ensures the job is done right the first time, saving you money and frustration in the long run. This involves more than just picking the cheapest option; it’s about finding a qualified, experienced, and reliable professional.
Assessing Experience and Qualifications
A good installer possesses a strong understanding of James Hardie siding installation techniques and local building codes. Look for installers with proven experience in installing James Hardie products. Check for certifications or affiliations with industry organizations, as these can signify a commitment to quality and training. A portfolio of past projects showcasing successful installations is also valuable. This provides visual evidence of their ability to handle various types of siding jobs.
Verifying Licensing and Insurance
Checking an installer’s licensing and insurance is essential. This confirms they’re authorized to operate in your area and financially protected in case of accidents or damages during the installation. Always request copies of their current business license and proof of general liability insurance. This is a legal and safety requirement that protects both you and the installer. Verify that the insurance coverage is adequate to handle potential damages.
Checking References and Past Projects
Before hiring an installer, reach out to previous clients. Talking to references provides valuable insights into the installer’s work ethic, communication skills, and overall performance. Ask about the quality of the installation, the timeline, and the professionalism of the installer. Reviewing completed projects gives a clear picture of the installer’s skill and attention to detail. Photos and detailed descriptions of previous projects provide concrete examples of their work.
Comparing Installer Guarantees
Understanding the terms of different guarantees is important. These guarantees protect you from defects in materials or workmanship. Compare various types of guarantees offered by different installers, including labor, materials, and workmanship.
| Guarantee Type | Description | Example |
|---|---|---|
| Labor Guarantee | Covers repairs or replacements if installation labor is faulty. | The installer guarantees the labor for 5 years. |
| Material Guarantee | Covers the replacement of defective materials used in the siding installation. | The manufacturer’s warranty on James Hardie siding material is transferred to the homeowner. |
| Workmanship Guarantee | Covers repairs or replacements if the siding installation does not meet the agreed-upon quality standards. | Installer offers a 10-year workmanship guarantee. |
A comprehensive guarantee provides greater peace of mind, but always carefully review the fine print to understand the specific terms and conditions.
Understanding Installation Costs
Figuring out the price tag for James Hardie siding installation can feel like navigating a maze. Fortunately, understanding the factors involved makes the process much clearer. Knowing what goes into the cost helps you compare quotes effectively and avoid surprises down the road.
Knowing the price range helps you avoid overpaying or being underwhelmed by a low bid. It also empowers you to negotiate and make informed decisions about your siding project.
Factors Affecting Installation Costs
Several key factors influence the total cost of a James Hardie siding installation. These range from the size of the house to the complexity of the job. Factors include labor rates, material costs, and the specific siding options chosen. The type of foundation, the need for extra materials like flashing or specialized fasteners, and any existing damage to the house also contribute to the overall cost. The geographical location of the project is a significant factor, as labor rates and material costs can vary greatly.
Elements Influencing Siding Type Pricing
Different James Hardie siding options have varying costs. The material itself plays a significant role. For example, fiber cement siding, a common choice, is more expensive than vinyl siding, but generally lasts longer. The thickness of the siding panels and the complexity of the design will also impact the price. Specific features, like the inclusion of trim or accents, will add to the total cost.
Typical Pricing Ranges for James Hardie Siding Installation Projects
Pricing for James Hardie siding installation projects is not standardized and depends heavily on several factors, including the size of the home, the type of siding chosen, the complexity of the installation, and the location. However, a general range for installation costs, per square foot, can be between $5 and $15, depending on the above factors. A small, straightforward project might fall within the lower end of the range, while a large, complex project might be closer to the upper end.
How to Get Multiple Quotes from Different Installers
Getting multiple quotes is crucial for making a well-informed decision. It allows you to compare prices, evaluate the quality of services offered, and choose the best option for your needs. Contact several James Hardie siding installers in your area. Be clear about the scope of the project and your expectations. Be prepared to provide detailed measurements of the area to be sided and a list of any special considerations or requirements. Also, make sure you get detailed breakdowns of the costs, not just a total price.
Costs Associated with a James Hardie Siding Installation Project
| Category | Description | Typical Cost Range |
|---|---|---|
| Materials | James Hardie siding panels, fasteners, flashing, and other necessary components | $2,000 – $10,000+ |
| Labor | Cost for the installation crew’s time and expertise | $3,000 – $15,000+ |
| Preparation | Demolition of existing siding, cleanup, and necessary repairs | $500 – $2,000+ |
| Permitting | Obtaining necessary permits from local authorities | $100 – $500+ |
| Accessories | Cost of any additional accessories like trim, accents, or specialized hardware | $200 – $1,000+ |
Note: These are estimates, and actual costs may vary. The best way to get an accurate price is to request detailed quotes from several installers.
Comparing Installation Options
Picking the right James Hardie siding installation method is crucial for a beautiful and lasting finish. Different methods impact the cost, speed of installation, and the overall aesthetic. Understanding these options will help you make an informed decision that meets your needs and budget.
Choosing the right installation method involves considering the specific type of James Hardie siding, its finish, and the complexity of your home’s design. Different installation techniques are suitable for various siding materials and architectural styles.
James Hardie Siding Types
James Hardie offers a variety of siding options, each with its characteristics. Understanding these differences helps determine the best installation approach. The most common types include:
- Fiber Cement Siding: This is the most popular choice, known for its durability and resistance to rot, fire, and insects. It’s a great long-term investment, and is available in various colors and textures.
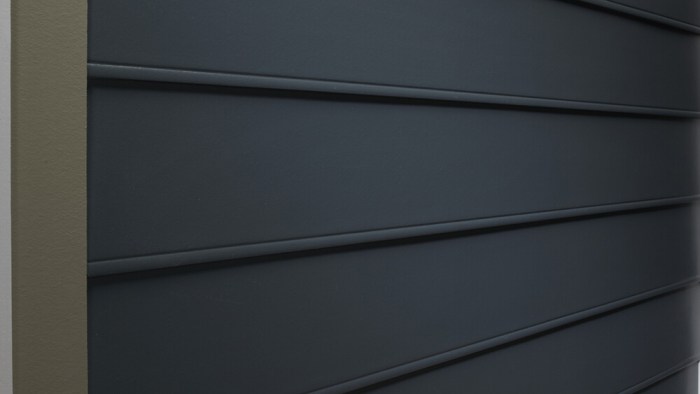
- Lap Siding: A classic style, lap siding features overlapping panels. It’s a versatile option for a wide range of architectural styles and offers a traditional aesthetic.
- Panel Siding: Often used for its streamlined look, panel siding is made of fiber cement. Its smooth, flat panels create a modern, contemporary appearance.
- Trim and Accessories: James Hardie also provides various trim and accessories, like corner boards and soffit, that complement the siding and enhance the overall design.
Installation Methods
Several methods exist for installing James Hardie siding. Each approach has its advantages and disadvantages, affecting both cost and timeframe.
- Direct-to-stud: This method involves attaching the siding directly to the framing studs. It’s a common and generally faster method, especially for simple designs. However, it may not be suitable for all siding types or homes with unique structural elements.
- Dry-fit: This method involves pre-measuring and positioning the siding on the wall before final attachment. It can help ensure a precise fit and alignment and may reduce potential errors during the installation process. However, it may increase the installation time for complex designs.
- Installation over existing siding: In some cases, James Hardie siding can be installed over existing siding. This can be more cost-effective than replacing the entire structure, but it depends on the condition of the existing siding and requires careful assessment.
Siding Finishes and Colors
The finish and color of your James Hardie siding significantly impact its aesthetic appeal. James Hardie offers a wide array of finishes, including smooth, textured, and painted options. The colors available cater to a variety of design preferences, from classic neutrals to bold and vibrant hues. This choice is highly personal and impacts the overall feel of your home.
Comparison Table
This table provides a general overview of different installation methods, considering speed, cost, and aesthetic outcomes. Note that specific costs will vary based on the size of your home, the complexity of the design, and your local labor rates.
| Installation Method | Speed | Cost | Aesthetic Results |
|---|---|---|---|
| Direct-to-stud | Faster | Potentially lower | Suitable for simple designs |
| Dry-fit | Potentially slower | Potentially higher | Precise fit and alignment |
| Over existing siding | Potentially faster | Potentially lower | Dependent on the existing siding condition |
Preparing Your Home for Installation
Getting your home ready for James Hardie siding installation is crucial for a smooth and successful project. Proper preparation minimizes potential issues during the installation process, ensuring a flawless final product. This involves more than just clearing the area; it’s about setting the stage for a job well done.
Thorough preparation, from site cleanup to existing siding removal, significantly impacts the overall quality and efficiency of the installation. A well-prepared site translates to fewer delays, reduced costs, and a more professional-looking final product. By understanding the steps involved, you can contribute to a positive experience for yourself and the installers.
Site Preparation and Cleanup
Proper site preparation is essential for a safe and efficient installation. This includes clearing the area around the home where the siding will be installed. Remove any debris, landscaping, or obstacles that could interfere with the installers’ access or create safety hazards. This proactive step ensures a clean workspace and prevents accidents. Ensure the area is level and stable to support the new siding. This is vital to avoid future problems and ensure the siding is correctly affixed to the home.
Existing Siding Removal
Removing old siding is a necessary part of the process, and it’s important to understand the nuances of this step. Removing existing siding properly is critical. Incorrect removal can lead to damage to the underlying structure of your home. This includes careful removal of any nails, screws, or other fasteners to avoid damaging the house’s structure or creating hazards for the installers. It’s also important to remove any damaged or deteriorated materials to prevent future problems. Thorough removal of the old siding ensures a secure and reliable foundation for the new siding.
Safety Measures
Safety is paramount throughout the entire installation process. Installers need a safe working environment, and homeowners need to prioritize safety measures. Homeowners should remove any items that could pose a hazard to the installers. Ensure the area is clear of obstructions, such as ladders, tools, and other equipment that could cause tripping hazards. Communicate with the installers about any specific concerns or safety precautions you have. Proper communication and adherence to safety guidelines help to ensure the well-being of everyone involved.
Home Preparation Tasks by Installation Phase
- Before Installation: Ensure all necessary permits are obtained, confirm the installation date and time with the installers, and clear the work area of any obstacles or items that could interfere with the installation process. This proactive measure will save time and prevent issues during the installation.
- During Installation: Be present during the installation process to address any concerns or questions promptly. Observe the installers’ safety procedures and be available to answer any questions. This collaboration is key to a smooth and efficient installation process.
- After Installation, inspect the new siding to ensure it meets your expectations and there are no loose or damaged sections. Confirm that the installation adheres to local building codes. This final inspection is essential for your satisfaction and the long-term integrity of your home’s siding.
Common Installation Issues and Solutions
Getting James Hardie siding installed correctly is crucial for its longevity and curb appeal. However, issues can arise during the installation process. Understanding potential problems and how to address them will help you avoid costly repairs and ensure a beautiful, lasting finish.
Knowing what to look for during and after the installation process can save you headaches and money. From minor measurement errors to major workmanship concerns, being proactive is key. This section details common installation problems and actionable solutions to help you navigate the process smoothly.
Identifying Potential Problems
Accurately assessing the job site and materials is paramount. Poor measurements, inadequate preparation of the existing structure, or using damaged/incorrect materials can lead to future problems. Also, insufficient labor, lack of proper training, and a lack of adherence to industry standards are potential issues. Spotting these early can prevent costly rework later.
Addressing Improper Measurements and Material Defects
Improper measurements are a common issue. If the siding isn’t cut or fitted correctly, it can lead to gaps, overlaps, and a less-than-desirable final product. Similarly, using damaged or incorrect materials will affect the siding’s durability and aesthetic appeal. Inspecting materials and measurements thoroughly, preferably before installation, is vital. Verify that the materials match the specifications agreed upon and that the measurements are accurate to avoid future problems.
Handling Workmanship Concerns
If you have concerns about the quality of the work, document everything meticulously. Take photos of any areas of concern, note dates and times, and keep detailed records of conversations with the installer. Communicating these concerns early and professionally can often lead to a satisfactory resolution. Remember, clear communication is key to resolving issues before they escalate.
Resolving Conflicts with Installers
Disagreements with installers can arise. A proactive approach, such as scheduling regular check-ins and open communication, can prevent conflicts. If problems do arise, follow your initial contract and communicate the issues clearly and respectfully. Mediation or arbitration may be necessary if the issues are significant.
Table of Common Issues and Solutions
| Issue | Possible Solution |
|---|---|
| Incorrect measurements | Review the contract, take photos of discrepancies, and contact the installer for clarification or corrections. Insist on re-measuring and confirming the measurements with a professional if necessary. |
| Damaged materials | Inspect materials thoroughly before installation. Request replacements for damaged or defective materials. If the problem is substantial, consult with the manufacturer. |
| Poor workmanship | Document issues with photos and detailed notes. Contact the installer to address the problem and seek remedies. If necessary, involve a professional to assess the damage. Follow your contract and escalation process, if one exists. |
| Material mismatches | Compare the materials against the agreed-upon specifications. Request clarification from the installer and ensure that the materials are consistent with the initial contract. |
| Installation issues (gaps, overlaps) | Address the issue with the installer immediately. If necessary, request a professional inspection to determine the extent of the problem and a detailed corrective plan. |
Maintaining James Hardie Siding: James Hardie Siding Installers Near Me
Keeping your James Hardie siding looking its best involves a bit of proactive care. Proper maintenance not only extends the life of your siding but also helps it resist the elements, saving you money on future repairs. A well-maintained James Hardie exterior can significantly increase your home’s curb appeal and value.
Regular maintenance is key to preventing costly repairs. This involves simple steps that can be incorporated into your seasonal routines. By following these guidelines, you can keep your James Hardie siding in top condition for years to come.
Importance of Regular Maintenance
Regular maintenance for James Hardie siding is crucial for several reasons. It helps prevent premature deterioration caused by weather exposure, pests, and other environmental factors. Proper care can identify and address potential problems early, preventing minor issues from escalating into major repairs. This proactive approach minimizes long-term costs and ensures your siding maintains its aesthetic appeal and structural integrity.
Protecting Your Siding from the Elements
Protecting James Hardie siding from the elements is a vital aspect of long-term maintenance. This involves a range of strategies, from simple preventative measures to more involved procedures. Proper ventilation, overhangs, and adequate gutter systems can significantly reduce water damage and improve the longevity of your siding.
Seasonal Maintenance Guide
Maintaining your James Hardie siding should be a seasonal routine. Following a schedule tailored to the specific weather conditions in your area is essential.
Spring Maintenance
Spring is a great time to assess your siding for any winter damage. Inspect for cracks, loose or missing fasteners, and signs of moisture damage. Addressing these issues early can prevent more significant problems later. This is also a good time to clean the gutters to prevent water from damaging the siding.
Summer Maintenance
Summer’s intense sun and potential for heat damage require proactive maintenance. Regular cleaning is crucial to prevent algae and mildew growth, which can diminish the siding’s appearance and lead to structural issues. Inspect for any signs of fading or sun damage, and address any problems promptly.
Autumn Maintenance
As the weather transitions to fall, ensure your siding is prepared for the coming winter. Thoroughly clean the siding to remove any debris, leaves, or dirt that may have accumulated during the summer. Inspect for any loose or damaged fasteners and ensure proper drainage around your home’s foundation to prevent water damage.
Winter Maintenance
During the winter, protect your siding from potential damage due to freezing temperatures, snow, and ice buildup. Make sure gutters are clear of ice and snow to prevent water damage. Regular inspection for any damage caused by the elements is crucial.
Cleaning and Inspecting Your Siding
Regular cleaning and inspection are essential for maintaining the appearance and integrity of your James Hardie siding. This involves using appropriate cleaning solutions and techniques.
- Cleaning Frequency: Cleaning your siding should be performed at least twice a year, or more frequently depending on your local weather conditions and the amount of debris accumulation.
- Cleaning Supplies: Use a soft-bristled brush, a garden hose, and a mild detergent solution. Avoid harsh chemicals that could damage the siding’s finish.
- Inspection Procedure: Regularly inspect your siding for any signs of damage, such as cracks, gaps, or loose fasteners. Pay close attention to areas around windows, doors, and corners where moisture can accumulate.
Addressing Damage and Issues, James Hardie Siding Installers Near Me
Promptly addressing any damage or issues is crucial to prevent further deterioration and maintain the quality of your James Hardie siding. Early intervention minimizes costly repairs and keeps your home’s exterior looking its best.
- Minor Issues: For minor issues like loose fasteners or small cracks, addressing them promptly with the right tools can save you money and time. Consult with a professional if you’re unsure about how to proceed.
- Major Issues: Significant damage, such as large cracks, rot, or significant water damage, requires professional assistance. Contact a qualified James Hardie siding installer for assessment and repair.
Conclusive Thoughts
In conclusion, finding and selecting the right James Hardie siding installer near you is a journey that demands careful consideration and preparation. By understanding the process, evaluating potential installers, and considering installation options, you’ll be well-equipped to make a smart choice. Remember to prioritize reputable installers, carefully review quotes, and thoroughly prepare your home for installation. With this knowledge, you can confidently tackle your James Hardie siding project, ensuring a beautiful and durable exterior for years to come.