Replacing Cedar Shake Siding A Comprehensive Guide
Replacing cedar shake siding is a significant home improvement project, demanding careful planning and execution. This guide provides a comprehensive overview of the process, from initial preparation to final touches. Understanding the steps involved, from assessing your existing siding to selecting the right materials, is key to a successful and satisfying outcome.
This detailed guide covers everything from the initial assessment of your current cedar shake siding to the installation of new materials, including considerations for cost, safety, and alternative options. It provides a clear roadmap for homeowners embarking on this project, ensuring they are well-prepared and informed.
Introduction to Replacing Cedar Shake Siding

Replacing cedar shake siding is a significant undertaking for homeowners, requiring careful planning and execution. This process often involves removing the old siding, addressing any underlying issues, and installing new cedar shakes. The scope of the project can vary greatly depending on the size of the house and the condition of the existing siding.
This guide will provide a comprehensive overview of the process, including the steps involved, common reasons for replacement, various styles and types of cedar shakes, and a cost comparison table.
Typical Steps in a Cedar Shake Siding Replacement Project
A successful cedar shake siding replacement project typically follows these key steps: Assessment of the existing siding and structure, careful removal of the old siding, proper preparation of the underlying surface, selection and acquisition of new cedar shakes, and meticulous installation of the new siding. Each step requires specialized knowledge and tools to ensure quality results and safety.
Common Reasons for Cedar Shake Siding Replacement
Homeowners choose to replace cedar shake siding for several reasons. Deterioration of the existing siding, including rot, insect infestation, and weathering damage, often necessitates replacement. Aesthetic considerations, such as wanting to update the home’s appearance, are also a driving factor. Further, addressing structural issues and ensuring long-term protection of the home’s exterior are critical reasons.
Styles and Types of Cedar Shake Siding
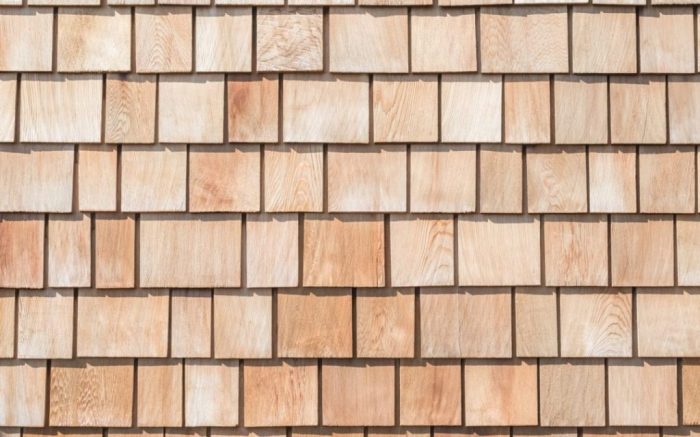
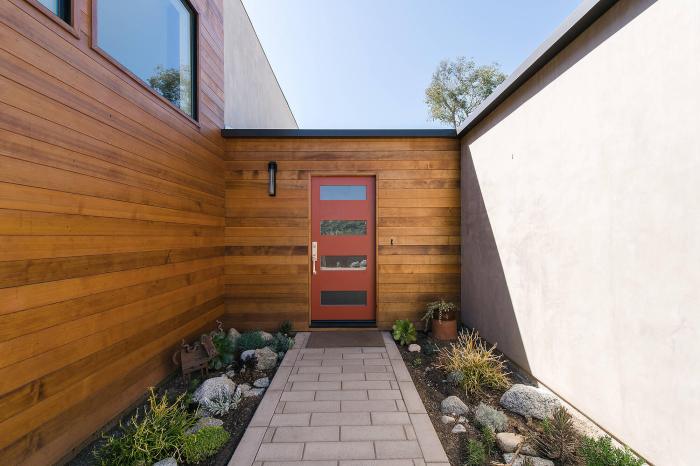
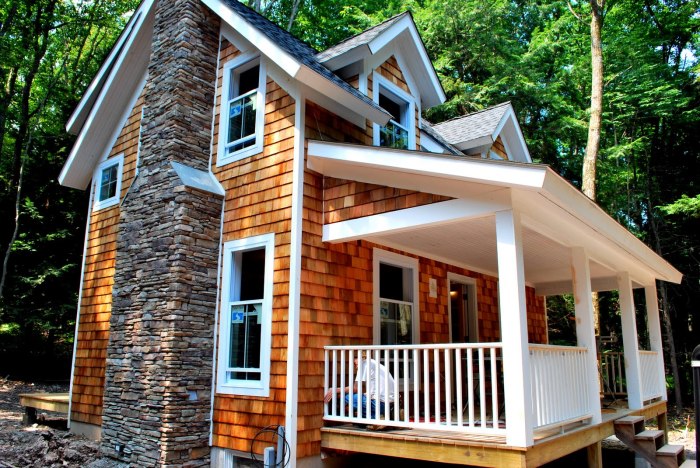
Cedar shake siding comes in a variety of styles and types, offering homeowners choices that complement their home’s architectural design. The classic shingle style is a popular choice, characterized by its natural appearance. Variations in shake profile, such as the width and length, can greatly affect the aesthetic appeal. The choice of wood species also impacts the overall look and durability. For instance, some cedar shakes might feature a more pronounced texture, while others are smoother, reflecting different manufacturing processes.
Comparison of Cedar Shake Siding Materials and Costs
| Material | Description | Typical Cost per Square Foot (USD) | Durability | Maintenance |
|---|---|---|---|---|
| Western Red Cedar | A popular choice known for its natural beauty and durability. | $5-$10 | High | Moderate |
| Eastern White Cedar | A less expensive alternative to Western Red Cedar, with slightly lower durability. | $3-$5 | Medium | Moderate |
| Pressure-Treated Lumber | Often used as a less costly option, but its lifespan and aesthetics are compromised. | $2-$4 | Low | High |
Note: Prices are estimates and may vary based on region, material quality, and labor costs. Factors like size, complexity, and location can impact the overall project cost.
Preparation and Planning for Replacement

Careful preparation is crucial for a successful cedar shake siding replacement project. Thorough planning minimizes potential issues, saves time and resources, and ensures a professional-looking final product. This involves understanding the existing structure, anticipating potential challenges, and assembling the necessary tools and materials.
Accurate assessments, detailed planning, and a well-organized approach to acquiring and preparing materials will directly influence the project’s overall success. This preparation phase forms the bedrock upon which a smooth and efficient replacement process is built.
Accurate Measurements and Planning
Precise measurements are essential for ordering the correct amount of materials. Measurement errors can lead to shortages or excessive material, both of which can increase costs. A detailed plan also helps to identify potential complications early in the process, allowing for proactive solutions. A site plan showing the layout of the siding, including any complex areas or unusual features, is highly recommended. This ensures that the materials are ordered correctly and the installation process runs smoothly. Using a combination of measuring tape, laser level, and possibly a blueprint or architect’s drawings can help ensure accurate measurements.
Assessing the Existing Siding and Identifying Potential Issues
Thorough inspection of the existing cedar shake siding is crucial to anticipate potential problems. This includes identifying areas with loose or damaged shakes, checking for signs of rot, water damage, or insect infestation. Note the type of fasteners used in the existing siding and their condition. Careful examination will help in determining the extent of the necessary repairs or replacements. Documenting any pre-existing conditions with photos or written descriptions can be invaluable for insurance purposes and for establishing a clear record of the project’s scope.
Necessary Tools and Equipment
A comprehensive list of tools and equipment is necessary for a cedar shake siding replacement project. Proper tools will ensure efficiency and reduce the risk of errors. This will not only make the process smoother, but it will also help in avoiding potential injuries.
- Measuring tools (measuring tape, level, laser level)
- Safety equipment (safety glasses, gloves, hard hat)
- Cutting tools (hand saw, power saw)
- Fastening tools (hammer, drill, screwdriver, nail gun)
- Cleaning tools (brushes, scrapers, pressure washer)
- Ladder and scaffolding (if needed)
- Utility knife
These tools are essential for effective and safe work.
Fastener Types and Applications
Selecting the appropriate fasteners is critical for the longevity and integrity of the new siding. The type of fastener will depend on the substrate and the desired level of security.
| Fastener Type | Description | Application |
|---|---|---|
| Nails | Common fasteners, available in various lengths and gauges. | Suitable for most wood substrates, particularly when the siding is directly attached to wood sheathing. |
| Screws | Offer greater holding power than nails and can be used in various materials. | Preferred for applications where a stronger, more secure fastening is required, such as when installing siding on engineered wood or composite sheathing. |
| Roofing nails | Specifically designed for roofing and siding applications, often featuring a wider head for added strength. | Useful for attaching siding directly to the roof sheathing, where extra holding power is needed. |
Careful consideration of fastener types will prevent future issues and ensure the longevity of the replacement siding.
Removal of Existing Siding
Removing the old cedar shake siding is a crucial step in the replacement process. Careful and methodical removal minimizes damage to the underlying structure and ensures a smooth transition to the new siding. Proper technique and disposal methods are essential for safety and environmental responsibility.
A methodical approach to siding removal prevents costly errors and ensures a safe and efficient project. Thorough planning, including identifying potential complications like rotted wood or structural damage, is vital for a successful and controlled removal process.
Safe Detachment Techniques
Careful detachment is key to preserving the integrity of the house’s structure and minimizing damage to the new siding. A variety of tools and techniques can be employed, each with its advantages and disadvantages. Understanding these techniques helps choose the most appropriate method for the specific situation.
- Using a pry bar is a common method. A pry bar can be used to carefully lift and remove the shakes, working systematically from one end of the house to the other. However, using a pry bar requires skill and care to avoid damaging the underlying structure or adjacent materials. Improper use can lead to cracks or splintering. A pry bar should be used in conjunction with safety equipment such as gloves and eye protection. A rigid, non-slip surface should be ensured to prevent slipping while working on the roof or the house.
- Siding removal tools are specifically designed for this purpose. These tools often have a claw or hook design, making the process more efficient and reducing the risk of damage. The design of these tools allows for more precise removal, minimizing damage to the structure. They also tend to be safer for the worker compared to using pry bars.
Proper Disposal of Old Materials
Proper disposal of old siding material is crucial for environmental protection and adherence to local regulations. This step helps maintain a clean and healthy environment.
- Local regulations dictate disposal methods. Contact your local waste management authorities to determine the proper disposal procedures for old cedar shakes, including whether or not there are specific recycling programs available. It’s important to adhere to these guidelines to prevent environmental contamination and ensure compliance with local ordinances.
- Composting is a viable option for certain types of wood siding, but cedar shake may not be ideal for all composting methods. Confirm that your local regulations permit the composting of cedar shakes, and ensure the cedar shake siding is free of any hazardous materials or substances before disposal.
- Landfills are a final option. Ensuring that the old siding is properly packaged and transported to the landfill is crucial to prevent damage during transit. Check with your local waste management authorities to ensure the correct procedure is followed, as different types of waste materials have different disposal requirements.
Handling Potential Complications
Potential complications during removal must be anticipated and addressed promptly to minimize damage and ensure a safe work environment. Understanding these potential complications allows for preparation and the implementation of mitigation strategies.
- Rotted wood or damaged structures require immediate attention. If rotted wood or structural damage is encountered during the removal process, the area should be immediately assessed by a qualified professional. A qualified professional will be able to determine the extent of the damage and recommend the appropriate repair procedures. This helps prevent further damage and ensure the safety of the house’s structural integrity.
Installation of New Siding
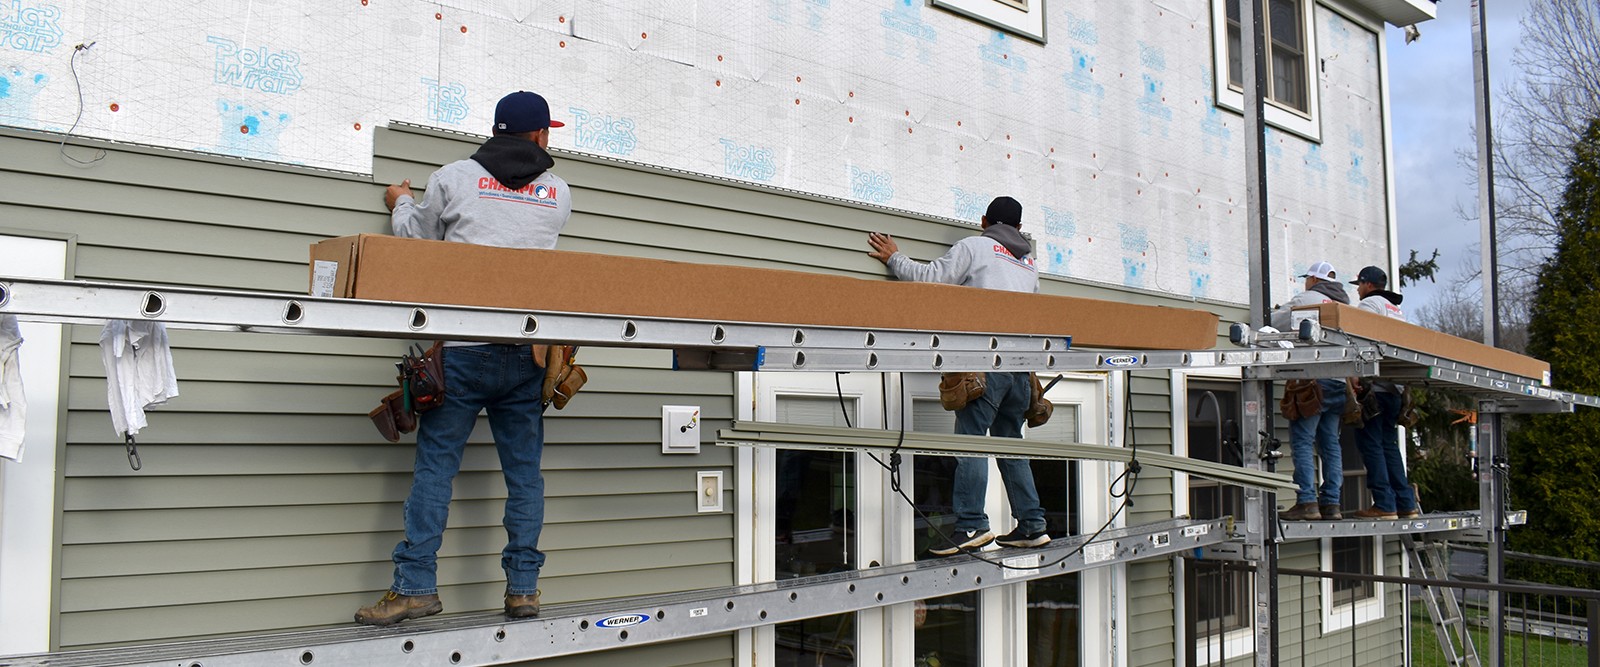
Installing new cedar shake siding requires careful attention to detail and precise techniques. Proper installation ensures longevity, aesthetics, and protection from the elements. This section details the process, emphasizing crucial steps for a successful and durable installation.
Securing the New Shakes
The proper attachment of the new cedar shakes is critical to the overall integrity of the siding. Incorrect attachment can lead to premature deterioration and structural issues. The method of fastening must be adapted to the specific type of shake and the structure of the building.
- Fastening Method: Use appropriate fasteners, typically galvanized nails or screws, that are designed to penetrate the shake and the sheathing underneath without causing splitting. Match the fastener size and type to the shake thickness. Oversized or improperly chosen fasteners can cause damage. For example, a thin shake might require smaller nails than a thick one.
- Spacing and Overlap: Maintaining consistent spacing and overlap between shakes is essential for a visually appealing and watertight installation. Correct spacing and overlap patterns will prevent gaps where water can penetrate. Properly overlapping shakes is critical to creating a continuous water barrier.
- Sealant Application: Apply a quality sealant to the edges of the shakes and at all fastener points. This seals out moisture and provides a barrier against rot and decay. The sealant will create a strong barrier that protects the underlying materials from moisture and pest damage. This sealant should be a waterproof type and should be applied according to the manufacturer’s instructions. For example, a silicone-based sealant is excellent for outdoor use, providing long-lasting protection.
Creating a Water-Resistant Barrier
A robust water-resistant barrier behind the siding is essential for preventing moisture from penetrating the structure. This barrier should be vapor permeable to allow moisture to escape while also effectively blocking water intrusion.
- Installation of Underlayment: Install a waterproof underlayment, such as a specialized sheathing paper or a synthetic membrane, over the sheathing. This layer should be secured and free of wrinkles or gaps. Critically, the underlayment should extend past the edges of the shakes to prevent water from traveling under them.
- Flashing: Install flashing around windows, doors, and other openings to prevent water from accumulating in these vulnerable areas. Flashing should be carefully sealed to ensure complete protection.
Importance of Proper Spacing and Overlap, Replacing cedar shake siding
Proper spacing and overlap are vital for creating a weather-resistant and aesthetically pleasing installation. Incorrect spacing can lead to gaps that allow water to enter the structure, potentially causing significant damage.
The overlap pattern should follow manufacturer recommendations, typically creating an overlapping pattern of 1-2 inches. This pattern is important for directing water away from the house.
- Uniformity: Maintain consistent spacing and overlap throughout the entire installation for a cohesive look. This consistency is crucial for a professional appearance and prevents any potential water entry.
- Water Management: Proper overlap directs water away from the building, minimizing the risk of leaks and damage. Overlapping the shakes prevents water from accumulating and seeping behind the siding.
Finishing Touches and Considerations
Completing a cedar shake siding replacement project involves more than just the installation process. Careful attention to detail in the final steps, including thorough inspection and addressing any issues, is crucial for a long-lasting and aesthetically pleasing result. Proper maintenance practices are equally vital for preserving the beauty and longevity of the new siding.
Final Steps and Inspection
The final steps of a cedar shake siding replacement involve meticulous attention to detail. This includes ensuring all fasteners are secure and hidden, and that the new siding meets the desired aesthetic standards. Proper caulking is essential to prevent water intrusion and maintain the integrity of the structure. A comprehensive visual inspection of the entire installation is crucial.
Addressing Post-Installation Issues
Identifying and rectifying any issues promptly after installation is vital. Minor imperfections, such as gaps or misaligned shakes, can be addressed relatively easily. More significant problems, like structural damage, should be reported to the contractor immediately. The contractor should be readily available to address any concerns and provide solutions for any issues arising during the warranty period.
Long-Term Maintenance and Care
Proper maintenance is essential for the longevity and beauty of cedar shake siding. Regular cleaning and inspections are important. Cleaning the siding should be done annually to remove debris and accumulated dirt. Regular inspection, checking for any signs of damage or deterioration, is equally critical. Addressing any issues early on will prevent larger problems from developing. This includes addressing any signs of rot, moisture damage, or pest infestation.
Table of Common Issues and Solutions
| Issue | Description | Solution |
|---|---|---|
| Gaps between shakes | Visible spaces between the individual cedar shakes. | Caulk the gaps with appropriate sealant, matching the siding color. |
| Loose or Missing Fasteners | Nails or screws that are not fully seated or missing. | Securely replace or re-drive the fasteners, ensuring they are hidden and not visible. |
| Uneven Siding | Siding that does not have a consistent and even appearance. | Inspect the installation procedure. Adjust the shakes as needed and unevenly reinstall sections. |
| Water Damage | Moisture penetration behind the siding can lead to mold or rot. | Identify the source of the water damage and address it (e.g., flashing repairs, gutter cleaning). Remove affected sections and replace with new siding. |
| Pest Infestation | Presence of pests like termites or carpenter ants. | Consult a pest control professional for effective treatment. Address the underlying issues that might be attracting pests. |
Cost and Materials
Replacing cedar shake siding can be a significant undertaking, and understanding the associated costs is crucial for planning. Budgeting accurately involves considering various factors, from material selection to labor rates and potential permit fees. This section will delve into the financial aspects of the project, providing insights into pricing, materials, and installation methods.
Typical Cost Estimates
Estimating the total cost for replacing cedar shake siding depends on several factors. A general range for a typical home (1500-2000 square feet) with existing siding needing complete replacement could be anywhere from $10,000 to $30,000. However, this range is highly variable, and specific pricing depends on factors like the condition of the existing siding, the size of the home, the complexity of the design, and the region. Factors impacting cost are detailed below.
Factors Influencing Project Cost
Several factors play a crucial role in determining the final cost of replacing cedar shake siding. These include the size of the house, the condition of the existing siding, the type of materials selected, labor costs in the area, and the complexity of the project. A house with a large, intricate design will likely incur higher labor costs compared to a simpler structure. Furthermore, extensive repairs or rebuilding of supporting structures might increase the overall cost.
Cedar Shake Siding Material Options and Pricing
Various cedar shake siding materials are available, each with its price point. Natural cedar shakes, often considered the highest quality, come with a higher price tag. Engineered or composite cedar shake alternatives can offer a more affordable option, but may compromise in terms of durability or longevity. The price range for these materials typically falls between $5 and $15 per square foot for natural cedar and $3 to $8 per square foot for composite alternatives.
Installation Method Costs
The installation method also impacts the overall cost. Traditional hand-nailing techniques can be more labor-intensive and lead to higher labor costs, but may offer a more aesthetically pleasing finish. Mechanized installation methods, while often faster, might not always offer the same level of customization and detail. Ultimately, the choice between methods should consider the budget, desired aesthetics, and the contractor’s expertise. The labor costs associated with these methods vary significantly, depending on the contractor’s experience and location.
Estimated Costs Table
The following table provides a general estimate of the costs associated with replacing cedar shake siding, broken down into labor, materials, and permits. These are approximate figures and will vary based on individual circumstances.
| Category | Estimated Cost Range |
|---|---|
| Labor | $4,000 – $12,000 |
| Materials | $5,000 – $15,000 |
| Permits | $200 – $500 |
| Total | $9,200 – $27,500 |
Troubleshooting and Common Problems

Source: roofingcalc.com
Replacing cedar shake siding can present various challenges. Understanding potential problems and their solutions is crucial for a successful and lasting project. This section addresses common issues, their causes, and effective solutions, emphasizing the importance of professional expertise.
Potential Installation Issues
Proper installation is paramount to prevent future problems. Incorrectly applied shakes can lead to leaks, water damage, and premature deterioration. Inaccurate measurements or inadequate support systems can compromise the integrity of the new siding.
- Improper nailing or fastening: Incorrectly placed nails or fasteners can lead to loose or damaged shakes, exposing the underlying structure to the elements. Using the wrong type or size of fastener or insufficient penetration are key contributing factors.
- Gaps and cracks between shakes: Uneven installation, shrinkage or expansion of materials over time, or a lack of proper caulking can cause gaps and cracks, leading to water infiltration. This is a critical issue requiring attention.
- Damaged or warped shakes: The shakes themselves may be damaged during delivery, storage, or installation. Using damaged or warped shakes can affect the overall aesthetic appeal and durability of the siding. Replacing damaged shakes immediately is vital.
Water Intrusion and Leaks
Water intrusion is a significant concern in siding replacements. Preventing water damage is essential to maintain the structural integrity and aesthetic appeal of the house.
- Improper flashing and sealant: Flashing around windows, doors, and roof intersections is critical for preventing water from entering the walls. Inadequate flashing or sealant can cause leaks. Careful attention to these details is crucial for a watertight installation.
- Poorly sealed seams and joints: Unsealed seams and joints can allow water to seep into the wall cavity, potentially causing rot, mold, and structural damage. Professional caulking and sealing are important.
- Drainage issues: Poorly designed or maintained gutters and downspouts can cause water to pool around the foundation, increasing the risk of water intrusion into the siding. Regular gutter maintenance is essential.
Structural Concerns
Structural integrity is crucial for long-term siding performance.
- Inadequate sheathing: If the sheathing beneath the siding is not adequately prepared or installed, the new siding may not adhere properly. This can lead to sagging or warping over time. The sheathing must be correctly installed.
- Insufficient support for the shakes: The structure must support the weight of the new shakes. Using inadequate supports can cause sagging, cracking, or other structural issues. Using the correct supports and proper installation techniques is critical.
- Poorly installed insulation: Incorrectly installed insulation can contribute to moisture buildup. Ensuring proper insulation is critical for a water-resistant home.
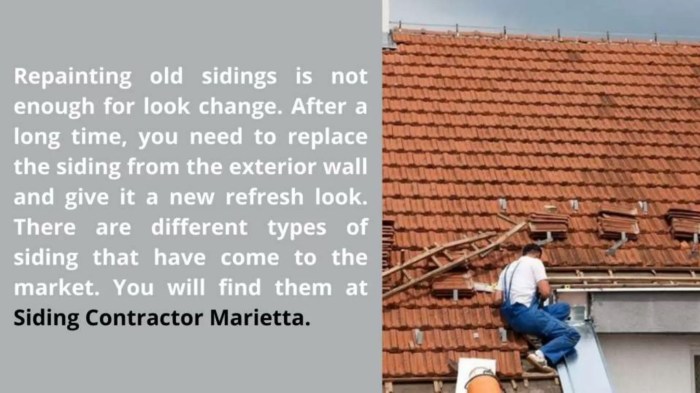
The Importance of Professional Help
Hiring qualified professionals is strongly recommended for a successful siding replacement.
- Expertise in installation techniques: Professionals possess the knowledge and experience to install siding correctly, addressing potential problems effectively. They understand the nuances of the materials and the specific needs of the house.
- Assessment of existing structure: Professionals can accurately assess the existing structure and identify potential vulnerabilities or areas requiring repair. A thorough inspection is crucial before starting the project.
- Addressing complex issues: Professional contractors can handle intricate issues like difficult-to-reach areas, unique architectural features, or structural concerns. They possess the expertise to resolve complex situations effectively.
Safety Precautions and Considerations: Replacing Cedar Shake Siding
Replacing cedar shake siding is a potentially hazardous undertaking, even for experienced DIYers. Proper safety precautions are crucial for preventing accidents and injuries. Thorough planning and adherence to safety protocols can significantly reduce risks throughout the project.
Essential Safety Gear
Safeguarding yourself during siding replacement is paramount. Wearing appropriate personal protective equipment (PPE) is essential to prevent injuries. This includes more than just basic clothing.
- Hard Hat: A hard hat is mandatory for protection against falling debris, tools, and other hazards. Ensure it fits snugly and is in good condition.
- Safety Glasses/Goggles: Protecting your eyes from flying debris, splinters, and chemicals is critical. Choose impact-resistant safety glasses or goggles specifically designed for construction work.
- Gloves: Protecting your hands is important, whether from cuts from wood or exposure to harsh chemicals. Work gloves made from durable materials are essential.
- Hearing Protection: Construction activities can generate significant noise. Use earplugs or earmuffs to prevent hearing damage, particularly when operating power tools.
- Work Boots: Robust work boots with steel toes provide crucial protection for your feet against falling objects, sharp edges, and potential hazards on the worksite. Ensure they are sturdy and properly fitted.
Fall Protection Measures
Working at heights requires rigorous fall protection protocols. Failure to implement these protocols can lead to serious injuries or fatalities.
- Harness and Lanyard: If working on a roof or other elevated areas, a properly fitted fall arrest harness, lanyard, and lifeline are essential. Ensure the system is inspected regularly and meets safety standards. Fall arrest systems are critical for preventing potentially fatal falls. Properly securing the harness and lanyard to a secure anchor point is crucial.
- Safety Net: If fall protection systems are not practical, a safety net or other equivalent protection system should be employed. The net should be properly secured and strong enough to support the weight of a worker in the event of a fall.
- Scaffolding and Platforms: Utilizing appropriate scaffolding and elevated work platforms is vital for reducing the risk of falls when working at heights. The scaffolding must be stable and appropriately designed to support the weight of workers and materials.
Emergency Procedures
Accidents can happen despite all precautions. Having a plan in place for handling emergencies is crucial.
- First Aid Kit: A well-stocked first aid kit should be readily available on the worksite. It should contain essential supplies for treating minor injuries.
- Emergency Contact Information: Keep emergency contact information readily available, including phone numbers for first responders and your medical providers.
- Communication Plan: Establish a communication plan to ensure that everyone on the worksite can easily contact someone in case of an emergency.
- Accident Reporting: Maintain a record of any accidents or injuries that occur during the siding replacement project. Thoroughly document the incident, including the date, time, location, and nature of the accident.
Ventilation and Dust Control
Proper ventilation and dust control are essential to maintain a safe and healthy work environment.
- Airflow: Ensure adequate airflow in the work area to prevent the buildup of dust, fumes, and other airborne contaminants. Use fans or other ventilation systems as needed. Poor ventilation can lead to respiratory problems and other health issues.
- Dust Masks: Use dust masks or respirators when working with materials that generate significant dust, like sanding or demolition.
Alternative Siding Options

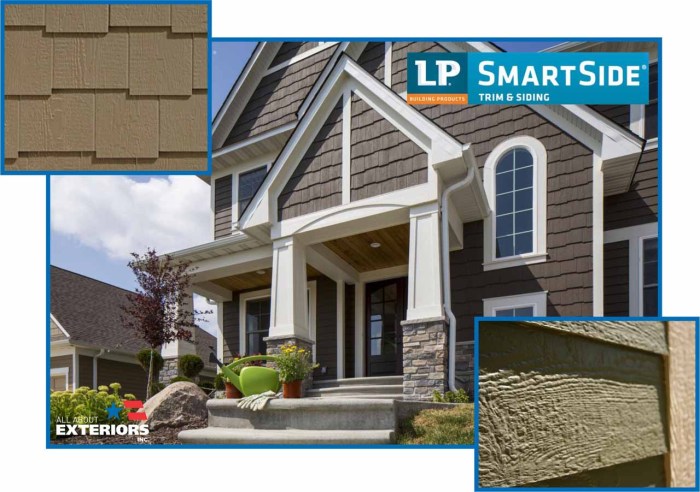
Replacing cedar shake siding often involves considering alternative materials. This section explores common alternatives like vinyl and fiber cement, evaluating their respective pros and cons, and providing a comparative analysis to help homeowners make informed decisions.
Understanding the nuances of each material is crucial, as different options offer distinct advantages and disadvantages in terms of cost, durability, and maintenance. This comparison will help homeowners weigh the long-term value of each material against the initial investment and ongoing upkeep.
Comparison of Siding Materials
Choosing an alternative to cedar shake siding involves evaluating various materials based on aesthetic preferences, budget constraints, and long-term maintenance needs. Factors such as lifespan, cost, and required upkeep are crucial considerations.
Vinyl Siding
Vinyl siding has gained popularity due to its affordability and low maintenance. Its resilience to moisture and rot makes it a strong contender. The material comes in a wide array of colors and textures, mimicking other materials like wood. Installation is generally straightforward, requiring less labor than some alternatives.
Fiber Cement Siding
Fiber cement siding offers a more natural aesthetic and superior durability compared to vinyl. Its resistance to moisture, pests, and fire is notable. It provides a more traditional look, often resembling wood siding, but requires careful consideration of its heavier weight and potential installation complexities.
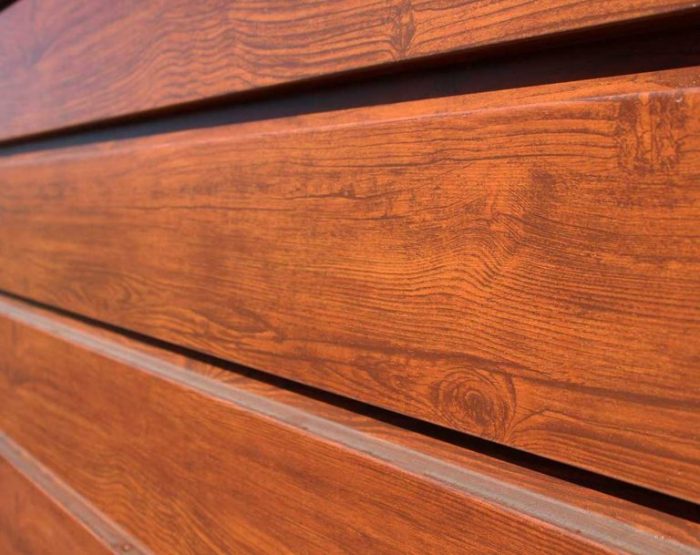
Wood Siding (Other Options)
Other wood siding options, such as lap siding or board-and-batten, can provide a rustic or classic look. However, they require more frequent maintenance than vinyl or fiber cement. Wood siding is prone to damage from the elements, demanding regular painting or staining.
Comparing Siding Materials
| Siding Material | Lifespan (Years) | Cost (per sq ft) | Maintenance |
|---|---|---|---|
| Cedar Shake | 25-50 (depending on care) | $5-$10 | Regular cleaning, periodic repairs |
| Vinyl | 50-75 | $3-$7 | Minimal, leaning as needed |
| Fiber Cement | 50-75+ | $5-$10 | Cleaning as needed; occasional caulking |
| Wood (Lap/Board-and-Batten) | 20-40 (depending on care) | $4-$8 | Regular painting or staining, and repairs as needed |
The table above provides a general comparison. Specific lifespan, cost, and maintenance requirements can vary based on factors like quality, installation techniques, and local climate conditions.
Durability and Maintenance
The long-term durability of siding significantly impacts the overall value of a home. Vinyl’s resistance to rot and warping makes it a low-maintenance option, while fiber cement offers excellent durability and fire resistance. Wood siding, while aesthetically pleasing, requires more consistent maintenance. Each material’s lifespan and maintenance demands should be carefully considered during the replacement process.
Conclusion
In conclusion, replacing cedar shake siding, while potentially complex, is achievable with careful planning and execution. This comprehensive guide has provided a roadmap for homeowners, equipping them with the knowledge and insights necessary to undertake this task successfully. From preparation and removal to installation and finishing touches, the steps Artikeld covers every facet of the project. Remember to prioritize safety and consider alternative siding options before making a final decision. The ultimate goal is a beautiful and durable replacement that enhances the home’s appeal and longevity.