Replacing Clapboard Siding A Comprehensive Guide
Replacing clapboard siding is a significant home improvement project that can significantly enhance your property’s aesthetic appeal and value. This guide provides a thorough overview of the entire process, from initial considerations to final maintenance. It explores various aspects, including preparation, material selection, installation techniques, and cost estimations, equipping you with the knowledge to navigate this undertaking successfully.
We’ll delve into the different types of clapboard siding materials available, weighing their pros and cons in terms of cost, durability, and maintenance. Understanding these factors is crucial in making an informed decision about the best material for your home. We’ll also provide valuable insights into the preparation steps, including assessing the underlying structure and removing the old siding, crucial for a successful replacement. Further, we’ll cover the installation process, from measuring and cutting the new siding pieces to securing them properly, with tips to avoid common mistakes.
Introduction to Replacing Clapboard Siding
Clapboard siding, a classic exterior finish, is characterized by its vertical, overlapping boards that create a distinctive aesthetic. Historically popular for its affordability and relatively straightforward installation, clapboard siding offers a relatively simple yet attractive facade. It’s a common choice for homes across various architectural styles.
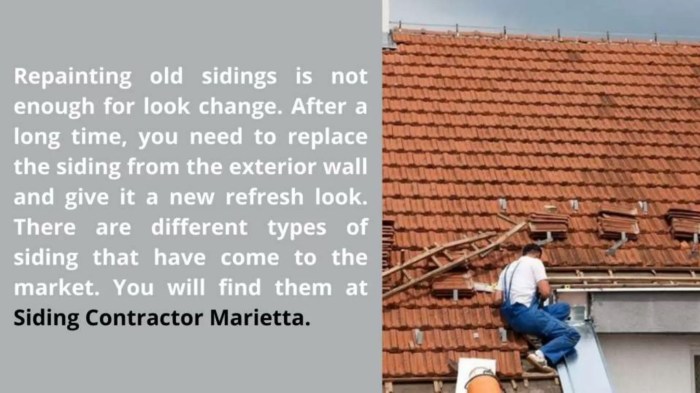
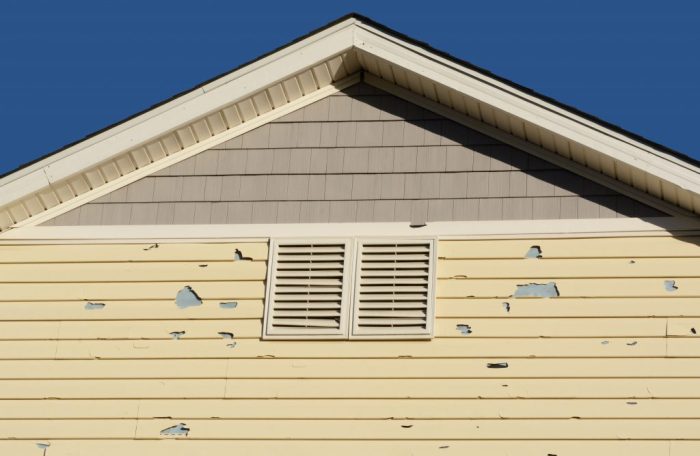
Homeowners frequently consider replacing clapboard siding due to factors such as significant deterioration, outdated appearance, or the desire to enhance the home’s energy efficiency. Damaged or decaying siding, often marked by rot, warping, or significant gaps, necessitates replacement. Moreover, the desire to update the exterior’s visual appeal and modernize the home’s look frequently motivates siding replacements. Finally, energy efficiency is another compelling reason. Replacing aging clapboard with newer, insulated options can significantly reduce heat loss and improve the home’s overall energy performance.
Clapboard Siding Materials
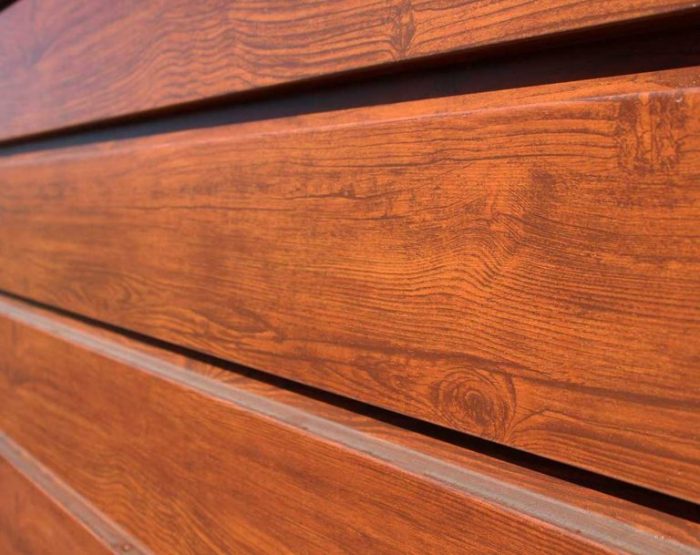
Various materials are used for clapboard siding, each with its own set of characteristics and benefits. Common choices include wood (pressure-treated or cedar), vinyl, fiber cement, and metal. Wood clapboard, often cedar or pressure-treated pine, offers a natural, traditional aesthetic. Vinyl siding provides a low-maintenance alternative, while fiber cement siding combines durability with a wood-like appearance. Metal clapboard, including aluminum and steel, is known for its long lifespan and resistance to weather.
Pros and Cons of Replacing Clapboard Siding
Replacing clapboard siding can offer significant advantages, but also presents potential drawbacks. Careful consideration of these factors is crucial for homeowners.
- Pros: Improved curb appeal, enhanced energy efficiency, protection from weather damage, extended lifespan of the home, and the potential to increase property value are key benefits of replacement.
- Cons: The cost of materials and labor can be substantial, the process can be disruptive, and the potential for errors during installation must be carefully considered.
Factors to Consider When Replacing Clapboard Siding
Careful evaluation of key factors is essential before undertaking a clapboard siding replacement project. A thorough assessment of these factors helps in making an informed decision.
| Factor | Description | Pros | Cons |
|---|---|---|---|
| Cost | Includes material costs, labor expenses, and potential permits. Consider the various siding options and their associated prices. | Cost-effective options are available, such as vinyl siding, which can reduce overall project costs. | Labor costs can vary significantly depending on the complexity of the project and the geographical location. |
| Material Choice | Different materials offer varying levels of durability, maintenance requirements, and aesthetic appeal. Assess your needs and budget when selecting the right material. | Certain materials, like vinyl, are low-maintenance, requiring minimal upkeep. | Some materials, such as wood, require regular sealing and maintenance to prevent deterioration. |
| Contractor Selection | Choose a reputable and experienced contractor with a proven track record. Obtain multiple quotes and references. | A skilled contractor can ensure a professional and high-quality installation. | Selecting an inexperienced or unreliable contractor can lead to installation issues and potentially costly repairs. |
| Energy Efficiency | Evaluate the insulation properties of different siding options to determine their impact on energy costs. | Insulated siding can significantly reduce energy consumption. | The cost of insulated siding might be higher compared to non-insulated options. |
Preparation for Replacing Clapboard Siding

Source: homefixated.com
Preparing a house for clapboard siding replacement involves a meticulous approach that prioritizes safety and efficiency. This phase sets the stage for a successful and durable replacement project. Thorough planning and careful execution during preparation minimize potential issues and ensure a smooth transition to the installation phase.
Assessing the Underlying Structure
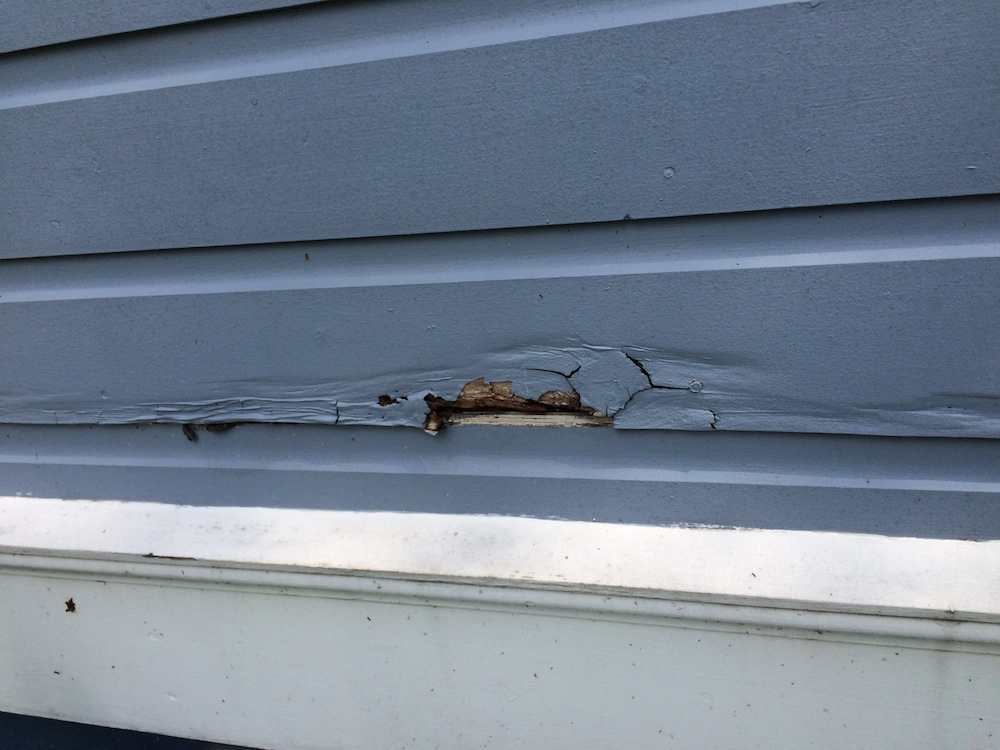
Before removing any existing siding, a critical evaluation of the underlying structure is essential. This assessment helps determine the structural integrity of the walls and the presence of any hidden issues. Inspecting the sheathing, wood framing, and insulation for damage, rot, or moisture intrusion is paramount. A thorough visual inspection can identify areas requiring immediate attention. Identifying and addressing any issues before proceeding with siding removal minimizes future problems and ensures the new siding is installed on a sound foundation. This step safeguards the long-term stability and appearance of the home.
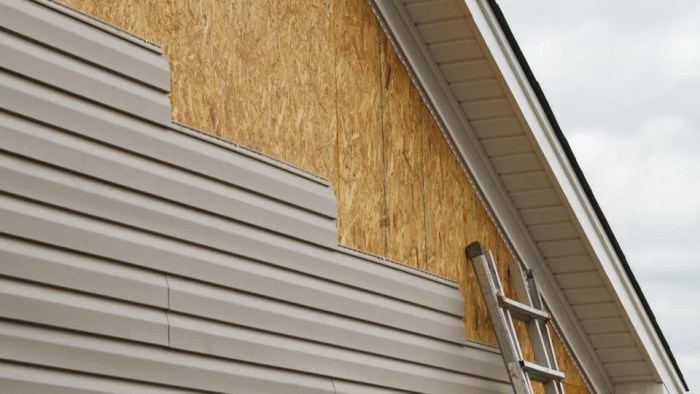
Removing Old Clapboard Siding
Proper removal of the old siding is crucial for a clean and efficient replacement. Improper removal can damage the underlying structure or leave behind debris. It’s important to proceed methodically, minimizing the risk of harm to the house’s structural integrity.
- Tools and Materials: Essential tools include a pry bar, a utility knife, a hammer, safety glasses, and work gloves. Specific materials, such as nails, screws, and a ladder, are essential for the task. The type of nails or screws used in the original siding will dictate the appropriate tools needed for removal.
- Step-by-Step Procedure: Begin by securing the work area and wearing appropriate personal protective equipment. Carefully remove any visible nails or screws. Work systematically, section by section, to prevent damage to the house’s structure. Carefully pry off the siding, working from the bottom up to avoid damaging the top sections. Store the removed siding appropriately to avoid further damage and maintain organization.
- Condition Assessment: Inspect the underlying sheathing and framing for signs of damage, rot, or moisture. Document any issues encountered during the removal process for informed decisions during the repair or replacement of the structure.
Common Problems During Removal and Solutions
Identifying potential problems during clapboard siding removal and addressing them promptly is critical. This proactive approach prevents more significant issues down the line.
| Problem | Solution |
|---|---|
| Loose or damaged sheathing | Repair or replace the damaged sheathing before installing new siding. This ensures the new siding is mounted on a stable foundation. |
| Rotted or damaged wood framing | Carefully inspect the affected area and determine the extent of the damage. If necessary, replace the damaged framing members. Properly repair or replace the affected area to ensure the structural integrity of the wall. |
| Moisture intrusion | Identify the source of moisture intrusion and address it promptly. Repair any leaks or gaps in the roof or exterior walls. Prevent further water damage by addressing the source of moisture intrusion. |
| Missing or damaged fasteners | Replace missing or damaged fasteners to ensure the new siding is securely attached. Use appropriate fasteners for the new siding material. |
Choosing the New Siding Material
Selecting the right siding material for your home replacement project is crucial. The chosen material impacts the longevity, aesthetics, and overall value of your property. Consider factors such as your budget, the home’s architectural style, and the desired level of maintenance. Proper material selection ensures a long-lasting and attractive exterior.
Different siding options offer varying levels of performance, durability, and cost. Careful consideration of these factors will lead to a siding choice that best suits your needs and preferences.
Comparison of Siding Materials
Various materials are available for replacing clapboard siding, each with unique characteristics. Understanding the strengths and weaknesses of each option is essential for making an informed decision.
- Vinyl Siding: Vinyl siding is a popular choice due to its affordability and low maintenance. It comes in a wide array of colors and styles, mimicking the look of other materials. Its resistance to rot, insect damage, and warping is a significant benefit. However, vinyl can be prone to cracking in extreme temperatures and may not hold up as well against impact damage as some other materials.
- Fiber Cement Siding: Fiber cement siding offers excellent durability and longevity. It resists moisture, pests, and fire, making it a resilient choice. Its natural look and ability to withstand harsh weather conditions are appealing. The downside is that fiber cement siding tends to be more expensive than vinyl and can be heavier, potentially requiring more robust installation.
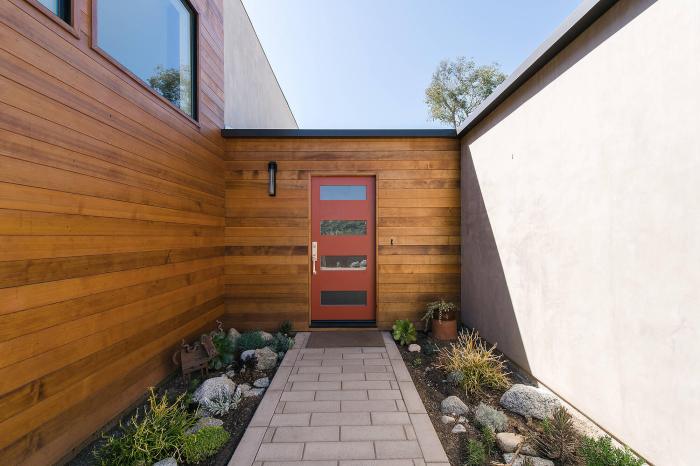
- Wood Siding: Wood siding provides a classic, natural aesthetic. Its warm appearance enhances the home’s character. However, wood siding demands regular maintenance to prevent rot, insect infestation, and damage from the elements. This includes painting or staining and ongoing upkeep to maintain its beauty and structural integrity. The cost of materials and the significant maintenance requirements need careful consideration.
Cost, Durability, and Maintenance Comparison
The table below summarizes the cost, durability, and maintenance requirements of common siding materials.
| Siding Material | Cost (Estimated) | Durability | Maintenance |
|---|---|---|---|
| Vinyl | $5-$10 per square foot | Moderate; susceptible to extreme temperatures | Low; minimal painting or staining needed |
| Fiber Cement | $10-$15 per square foot | High; resists moisture, pests, and fire | Moderate; periodic cleaning and inspection |
| Wood | $8-$12 per square foot | Moderate; susceptible to rot and pests | High, regular painting/staining, and repairs |
Choosing Siding Color and Style
Selecting a siding color and style that complements the existing architecture is important for aesthetic appeal. Consider the home’s architectural style, existing colors, and surrounding landscape.
- Architectural Style: A colonial home might benefit from a classic wood or fiber cement siding, while a contemporary home could be enhanced by a modern vinyl option. Matching the siding’s aesthetic to the house’s overall design is key.
- Color Palette: Research color palettes that align with the home’s architectural style and surrounding landscape. Consider using complementary or contrasting colors to create visual interest.
- Sample Installation: Visualizing the siding on your home can be achieved through mock-ups or by consulting with siding installers. This will provide a realistic representation of the final appearance.
Installation of New Clapboard Siding
Installing new clapboard siding is a significant undertaking, demanding precision and attention to detail. Proper installation ensures the longevity and aesthetic appeal of the siding, preventing future issues and protecting your home’s structure. This section details the crucial steps involved, from precise measurements to secure fastening, emphasizing best practices and common pitfalls to avoid.
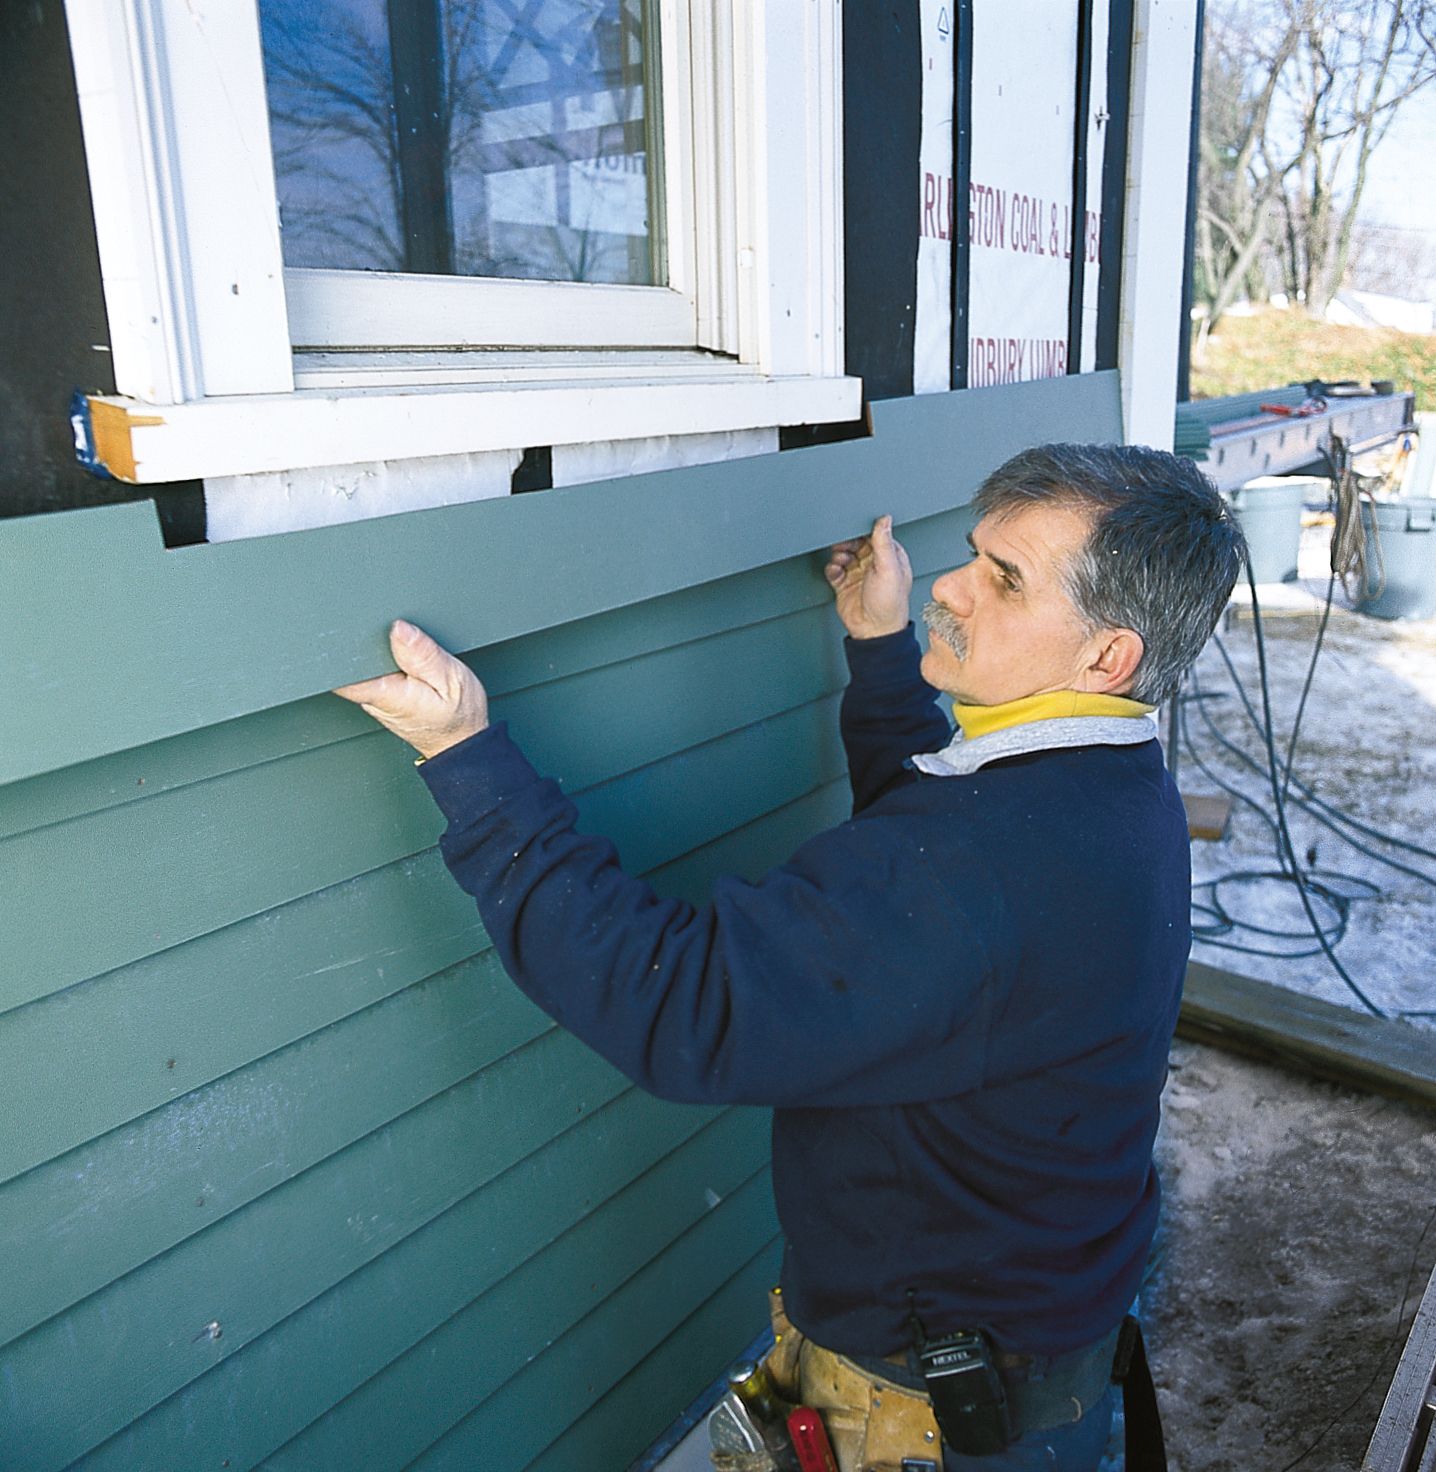
Measuring and Cutting Siding Pieces
Accurate measurements are fundamental to a successful clapboard siding installation. Incorrect measurements lead to wasted material, costly repairs, and an uneven or unsightly finish. Employing a measuring tape, pencil, and a level, carefully measure the vertical and horizontal dimensions of each section of the wall. Account for any irregularities in the wall’s surface. Subsequently, transfer these measurements to the new clapboard pieces, ensuring accurate cutting. Use a sharp utility knife or a reciprocating saw for precise cuts. Consider the overlap specifications for the siding, ensuring proper gaps for expansion and contraction.
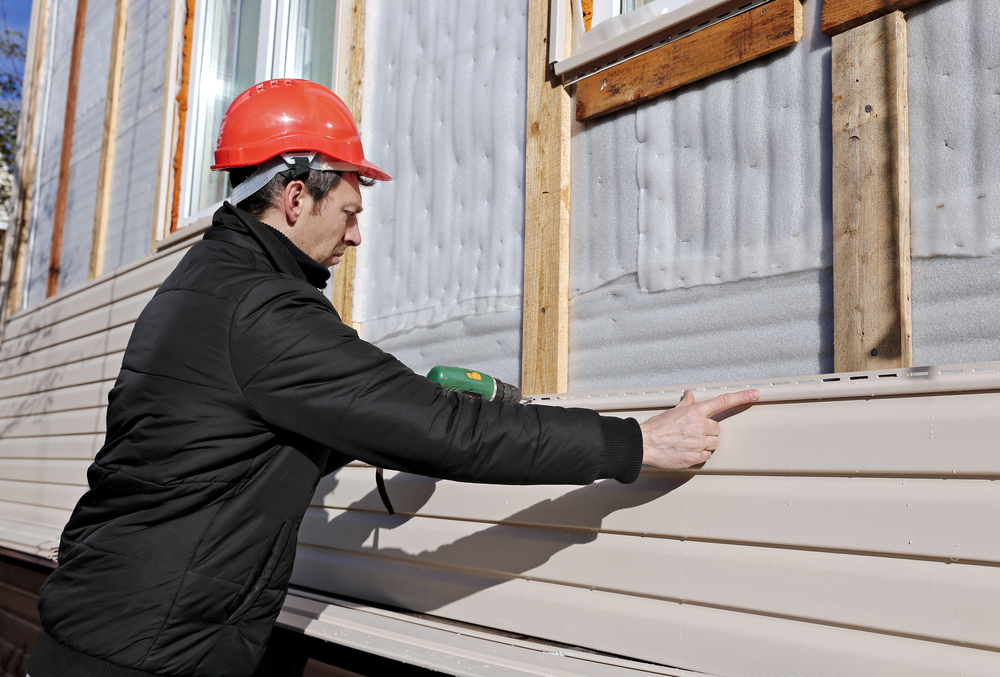
Securing the Siding to the Structure
The installation of new clapboard siding relies heavily on appropriate fasteners and proper spacing. Employing the correct fastening method is crucial for long-term structural integrity and aesthetic appeal. Use appropriate nails, screws, or specialized siding clips, depending on the type of clapboard and the building materials. Ensure that the fasteners are properly aligned with the nailing or screwing pattern of the underlying sheathing. Maintaining an even spacing between the siding pieces is important to create a uniform look. Pre-drilling pilot holes for screws can prevent wood splitting.
Common Installation Mistakes and How to Avoid Them
Several common mistakes can compromise the longevity and aesthetics of a clapboard siding installation. Improperly fastening the siding, especially at corners and joints, can lead to sagging, warping, or loosening over time. Insufficient caulking or sealing can cause water damage, compromising the structure and requiring costly repairs. Failing to account for expansion and contraction can lead to gaps, cracks, or unsightly warping. Always use appropriate sealant or caulk to prevent moisture infiltration at joints. Using the correct types of fasteners for the specific clapboard material and the building materials is vital.
Tools Needed for Installation
A well-equipped toolkit is essential for a smooth and efficient clapboard siding installation. The following table lists the essential tools, their descriptions, and their specific applications in siding replacement.
| Tool | Description | Use in Siding Replacement |
|---|---|---|
| Measuring Tape | Used for precise linear measurements. | Measuring wall dimensions, clapboard lengths, and overlaps. |
| Level | Ensures horizontal and vertical alignment. | Ensuring straight lines and proper placement of siding pieces. |
| Pencil | Used for marking measurements on the clapboard. | Marking cut lines on the clapboard and transferring measurements. |
| Utility Knife or Reciprocating Saw | For cutting the clapboard to size. | Cutting the clapboard to fit the wall and create the required overlap. |
| Hammer | Used for driving nails. | Driving nails into the sheathing to secure the clapboard. |
| Drill | Used for drilling pilot holes and driving screws. | Drilling pilot holes for screws to prevent splitting and driving screws into the sheathing. |
| Siding Staples/Nails/Screws | Used for fastening the clapboard to the structure. | Securing the clapboard to the sheathing, ensuring correct spacing. |
| Caulk Gun and Caulk | Used for sealing gaps and joints. | Sealing gaps between clapboard pieces and around edges for weather protection. |
| Safety Glasses | Protect the eyes from flying debris. | Essential for eye protection during cutting and hammering. |
| Gloves | Protect hands from cuts and abrasions. | Protecting hands during the handling of materials and tools. |
Finishing Touches and Maintenance: Replacing Clapboard Siding
Completing the clapboard siding replacement project involves meticulous finishing touches and ongoing maintenance to ensure the longevity and aesthetic appeal of your home’s exterior. Proper sealing, painting, and a proactive maintenance plan are crucial for preserving the investment and enhancing the curb appeal.
Careful attention to detail in these final steps ensures a professional and enduring result, preventing future issues and extending the lifespan of your new siding.
Sealing and Caulking
Proper sealing and caulking are essential steps in preventing water damage and maintaining the structural integrity of the new clapboard siding. Gaps and joints between boards must be sealed to prevent moisture penetration, which can lead to rot, mildew, and structural weakening. Using appropriate sealant and caulking compounds specific to your chosen siding material is critical. Failure to seal properly can compromise the siding’s protective layer and lead to costly repairs down the line.
Painting or Staining
Painting or staining the new siding is a crucial step to enhance its aesthetic appeal and protect it from the elements. Selecting the right paint or stain is important, considering factors such as color, durability, and the specific type of clapboard material. A high-quality exterior paint or stain formulated for siding will offer superior protection against weathering, UV rays, and moisture. Thorough preparation, including cleaning and priming, is essential for a smooth and long-lasting finish.
Long-Term Maintenance
Different siding materials have varying maintenance requirements. For example, vinyl siding often requires less maintenance than wood clapboard, while cedar clapboard needs more frequent staining to prevent decay. The specific maintenance schedule will depend on the material, local climate conditions, and the level of exposure to the elements. Understanding the specific needs of your chosen siding material is key to maintaining its integrity and beauty over time. Regular inspection and prompt action for any identified issues are crucial.
Preventive Maintenance Tasks
Implementing a preventive maintenance schedule is vital for extending the life of your clapboard siding. Regular inspections for signs of damage, such as cracks, gaps, or discoloration, are important. Promptly addressing minor issues can prevent larger problems and save money in the long run. Cleaning the siding periodically, typically at least once a year, to remove dirt, debris, and mildew, is also essential for maintaining the aesthetic appeal and preventing potential issues.
Post-Installation Inspection and Maintenance Checklist
A post-installation inspection and maintenance checklist is crucial for ensuring the longevity of your new siding. This checklist should include a detailed visual inspection for any gaps, cracks, or loose fasteners. Regular inspections, at least twice a year, will help identify potential issues early on, minimizing the need for extensive repairs. This proactive approach will prevent costly repairs and preserve the beauty of your home.
- Visual Inspection: Check for gaps, cracks, or loose fasteners.
- Cleaning: Clean the siding periodically to remove dirt, debris, and mildew.
- Sealant/Caulking: Inspect and reapply sealant/caulking as needed, especially around joints and seams.
- Painting/Staining: Check for signs of fading or damage and reapply as necessary, following manufacturer guidelines.
- Fasteners: Inspect fasteners for tightness and replace any that are loose.
- Record Keeping: Maintain a record of maintenance activities, including dates and any repairs or replacements.
Cost and Timeline Considerations
Replacing clapboard siding can be a significant home improvement project, requiring careful planning and budgeting. Understanding the potential costs and timelines involved is crucial for a successful and stress-free renovation. This section will provide a range of typical costs, factors influencing those costs, and a reasonable timeframe for the process.
Typical Cost Ranges
Clapboard siding replacement costs vary significantly depending on factors like the size of the house, the condition of the existing siding, and the chosen material. A rough estimate for a typical single-family home ranges from $5,000 to $20,000, though more complex projects or homes with extensive damage could easily exceed this. A smaller, two-story home might fall within the lower end of this range, while a larger, multi-story home with extensive repairs would likely be closer to the upper end. Keep in mind that these figures are just starting points; always get personalized estimates.
Factors Influencing Total Cost
Several factors contribute to the overall cost of a clapboard siding replacement. The size of the home is a key factor, with larger homes requiring more materials and labor. The condition of the existing siding, including any damage or rot, significantly impacts the project’s complexity and cost. The type of clapboard siding chosen, its quality, and the labor costs in your region will also play a role. Accessibility issues, like the home’s location or architectural design, may also add to the project’s expense. Furthermore, the need for additional work, such as repairing or replacing damaged trim, soffits, or fascia, will contribute to the overall cost. Lastly, permit requirements and any unforeseen complications during the installation process will also influence the final cost.
Estimated Time Frame
The timeframe for a clapboard siding replacement project usually ranges from a few days to several weeks. A straightforward project on a smaller home might be completed in a week, while a more extensive renovation on a large property could take several weeks. The duration hinges heavily on factors such as the complexity of the project, the availability of materials, the contractor’s schedule, and weather conditions. Additional considerations include permitting times and potential delays due to unforeseen issues during the installation process.
Obtaining Multiple Bids
To ensure you get the best possible value for your project, it is essential to get multiple bids from reputable contractors. This will allow you to compare pricing, project timelines, and the quality of services offered. Be sure to request detailed proposals from each contractor. This should include a breakdown of labor costs, material costs, and any additional fees. This comprehensive comparison will help you make an informed decision that aligns with your budget and expectations.
Project Costs and Timelines, Replacing Clapboard Siding
| Stage | Estimated Cost | Estimated Time |
|---|---|---|
| Preparation and Assessment | $500 – $1,500 | 1-3 days |
| Removal of Old Siding | $1,000 – $3,000 | 1-2 days |
| Installation of New Siding | $3,000 – $10,000 | 3-5 days |
| Finishing Touches and Inspections | $500 – $1,000 | 1-2 days |
Note: These are estimates, and actual costs and timelines may vary based on individual circumstances.
Environmental Impact of Replacing Clapboard Siding
Replacing clapboard siding, while necessary for a home’s upkeep, carries an environmental footprint. Careful consideration of the removal process, material selection, and disposal methods is crucial for minimizing this impact. This section delves into the environmental aspects of this common home improvement project.
Environmental Impact of Removing Old Clapboard Siding
The removal of old clapboard siding can generate waste, impacting the environment. The process involves physical labor, potentially requiring the use of tools and equipment that contribute to carbon emissions. The disposal of the removed materials, if not handled responsibly, can lead to environmental pollution.
Environmental Benefits of Sustainable Siding Materials
Sustainable siding materials offer significant environmental advantages. These materials are often sourced from renewable resources, reducing reliance on finite materials. They frequently utilize less energy in their production, contributing to lower carbon emissions. Furthermore, many sustainable materials have extended lifespans, reducing the frequency of replacement and the associated environmental impact.
Comparison of Environmental Footprints of Various Siding Materials
Different siding materials have varying environmental impacts. Factors such as material sourcing, manufacturing processes, and waste generation during installation and disposal influence their overall footprint. This section explores these differences comparatively.
Responsible Disposal Methods for Old Clapboard Siding
Proper disposal of old clapboard siding is crucial for environmental protection. Recycling options for wood and other components are often available, minimizing landfill waste. Proper sorting and handling of materials are essential to ensure effective recycling and reuse. Repurposing old clapboard siding for smaller projects or crafts can also contribute to reducing waste.
Table Comparing Environmental Impact of Different Siding Materials
| Material | Energy Consumption (Estimated kWh/m²) | Waste Generation (kg/m²) |
|---|---|---|
| Wood (Pressure-Treated) | 15-25 | 0.5-1 |
| Composite (PVC/Vinyl) | 10-15 | 0.2-0.5 |
| Fiber Cement | 20-30 | 0.6-1.2 |
| Metal (Steel/Aluminum) | 5-10 | 0.1-0.3 |
| Sustainable Wood (FSC Certified) | 15-25 | 0.5-1 |
Note: Values in the table are estimations and can vary based on specific manufacturing processes and regional factors.
End of Discussion
In conclusion, replacing clapboard siding is a substantial undertaking, but a rewarding one. This guide has provided a comprehensive roadmap for homeowners considering this project. From evaluating the various siding materials to understanding the installation process and the associated costs and timelines, we’ve covered every critical aspect. By following the advice and insights presented, you can make informed decisions, avoid potential pitfalls, and achieve a beautiful and durable siding replacement. Remember to meticulously plan and prepare, and seek professional help when needed.